

Weekend Breaks In France By Train


Quick Growing Vegetables
Quick growing vegetables are super handy whether you're a new gardener, gardening with kids or just in need of something to fill a bare spot in the vegetable garden fast.
And I have for you here 20 of the quickest growing vegetables you can harvest within a month PLUS must know rules for growing vegetables fast and planting tips for each variety.
So what are you waiting for? You really can grow your own food in just 30 days!
Table of Contents
How To Grow Vegetables Quickly
To grow vegetables quickly you need to ignore lots of conventional gardening advice. Key things to focus on are :
- Leafy Greens
- Warm Soil
- Soaking Seeds
- Planting Baby Veg Close
- Moist Not Drenched Soil
- Eating Thinnings
- Cut & Come Again Harvests
- Growing From Scraps
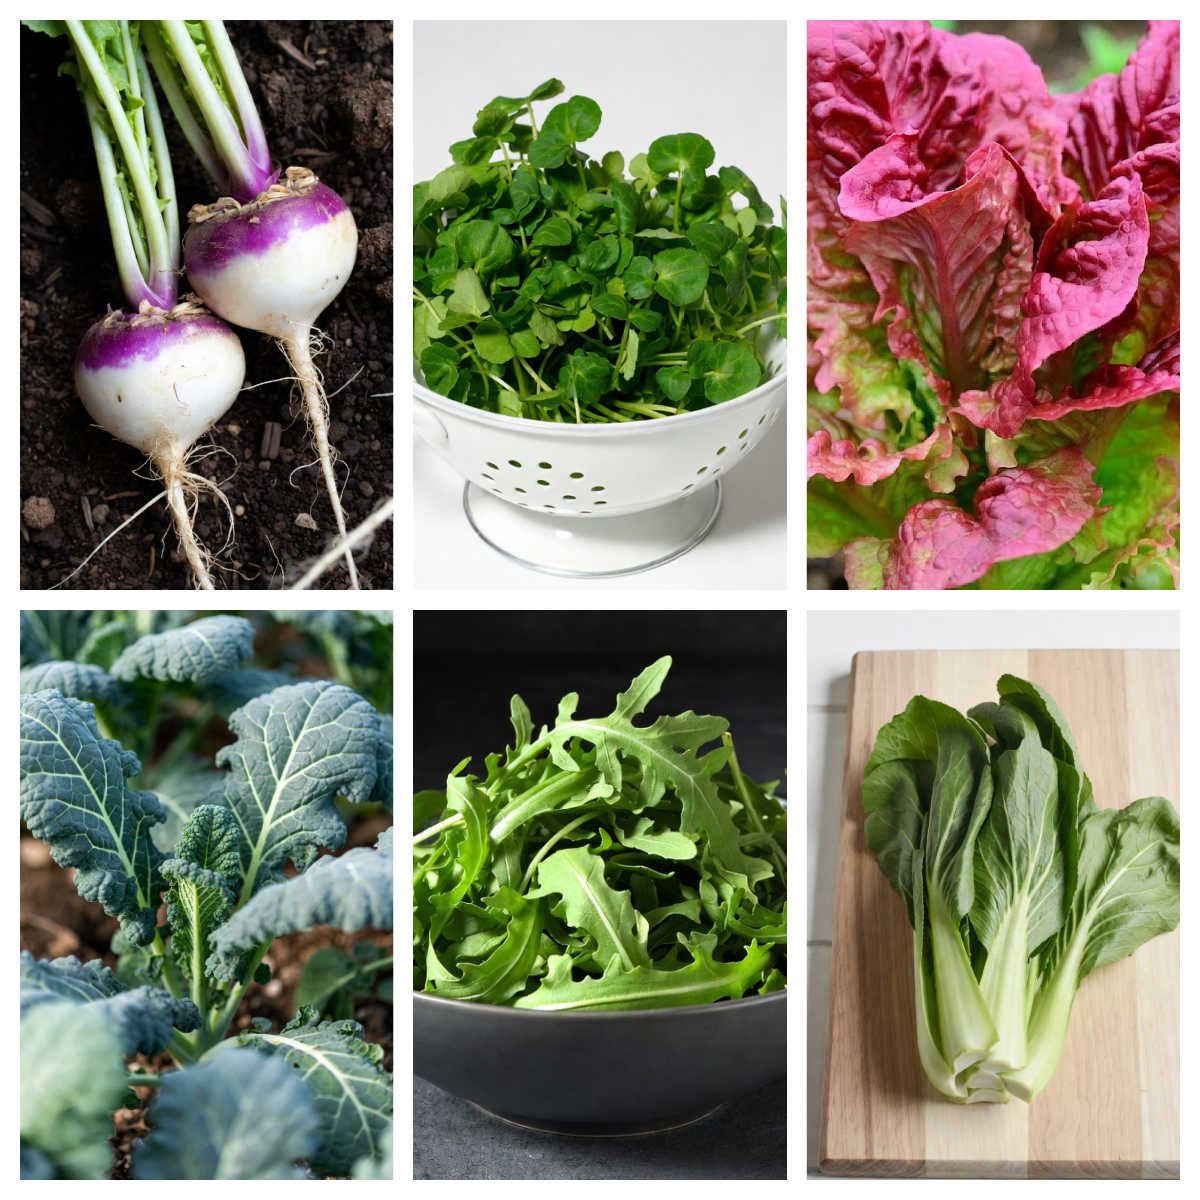
Leafy Greens
Leafy greens from cress and salad leaves to brassicas are the best quick growing vegetables. To avoid eating endless lettuce or cabbage pick from each of these groups :
- Cress
- Lettuces
- More Salad Leaves
- Baby Roots With Leaves
- Brassicas
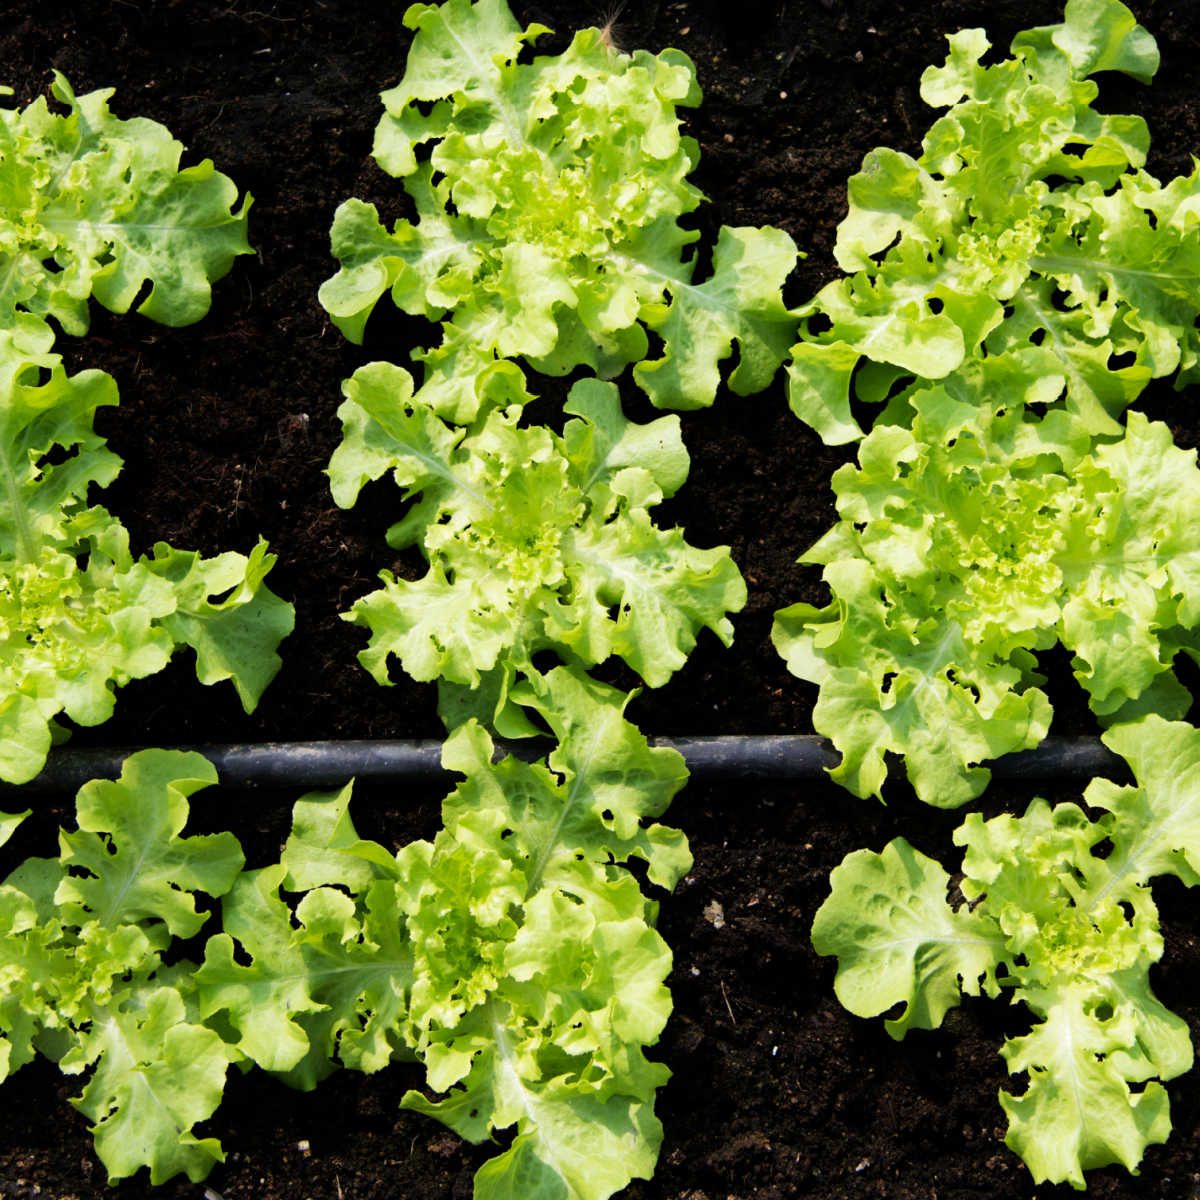
Planting Baby Vegetables Close
Look for varieties of leafy greens and some roots - e.g. radish - sold as baby varieties. Plant more of them closer together to get a good harvest of baby veg fast. There are tips on how close together you can plant each veg in the quick growing list below.
Warm Soil
Most vegetables germinate in a wide temperature range but will pop up quicker and more reliably in warmer soil. So warm soil with DIY plastic covers or cloches. Seeds germinate faster indoors but transplanting tiny leafy green seedlings is a non-starter!
Soak Seeds
Some seeds e.g. spinach, beet greens, spring cabbage & cavolo nero will germinate faster if soaked before planting. I have given soaking times in the planting guides below.
Moist Not Drenched
Seeds need constantly moist but not drenched soil to germinate. As top soil dries quickly, spritz or very gently water soil daily. Little thumb pot waterers are very useful for this.
Eating Thinnings
Vegetables always need thinning out so the healthiest seedlings have enough space to flourish. But don't let those thinnings go to waste - they can all be added to salads, garnishes and sauces.
Cut & Come Again
Almost all leafy greens can be grown as cut-and-come-again crops. A new harvest of leaves will regrow quickly each time you cut leaves for eating.
Typically follow on harvests will be 25-30% quicker than your first harvest, so your quick growing vegetables will grow even quicker!
Grow From Scraps
For a speedier harvest you can actually grow leafy greens from kitchen scraps. You simply pop the bottom of the stem in a bowl of water until it starts rooting and new leaves appear. Your new plant can then be popped in soil.
In my experience collards or spring greens are the best quick growing vegetables to grow from scraps.
Best Quick Growing Vegetables
The best quick growing vegetables all fall within these five categories :
Planting a range of these will give both your gut and your garden soil the diversity it needs for a healthy microbiome.
Cress
Cress of all types are very quick growing, so for a rapid harvest take your pick from :
- Garden Cress
- Land Cress
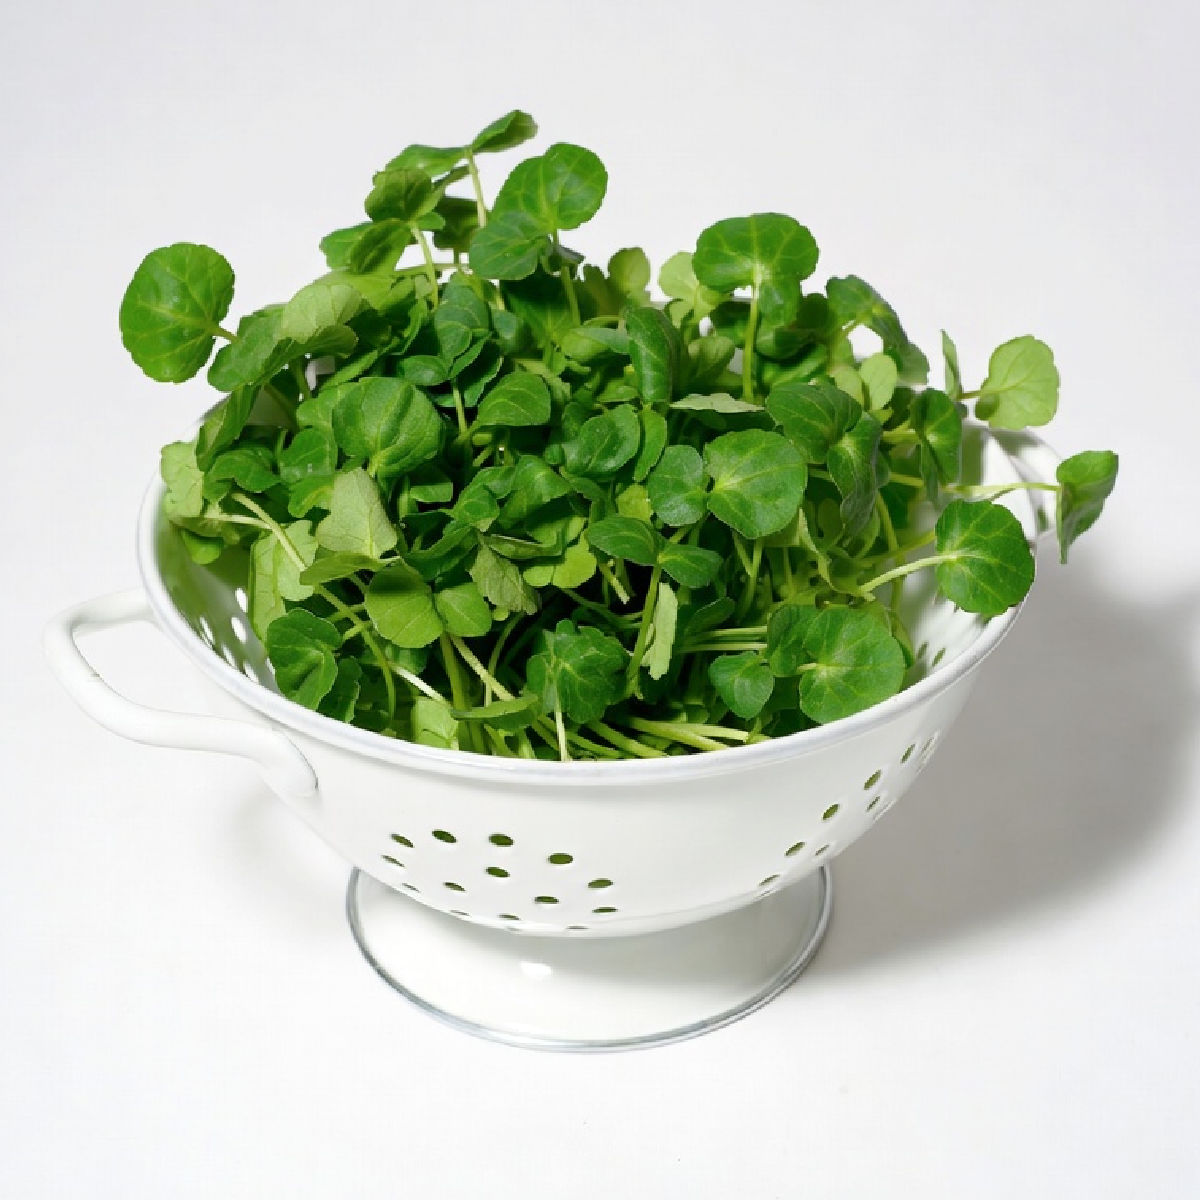
- Water Cress
Garden Cress
Many of us grew garden cress as a kids science project but it still worth growing these super speedy fresh, peppery sprouts that add a sharp bite to sandwiches, eggs, salads & soups :
- Germinate : 2-3 days
- Harvest : 7 days
- Min Temp : 15°C/59°F
- Max Temp : 25°C/77°F
To plant garden cress ...
- Broadcast sow densely on surface.
- Don't bury under soil.
- Keep soil/matting soaking.
- Don't thin.
Land Cress
Peppery perennial leaves with a strong flavour that's great in salads and sandwiches.
- Germinate : 5-7 days
- Harvest : 21 days
- Min Temp : 10°C/50°F
- Max Temp : 20°C/68°F
To plant land cress ...
- Sow 0.5cm deep.
- Space 2cm apart thinning to 5cm.
- Keep in partial shade.
- Requires high moisture, don't let soil dry out at all.
Watercress
Clean, sharp leaves with a refreshing bite, perfect for soups and salads.
- Germinate : 5-7 days
- Harvest : 21 days
- Min Temp : 15°C/59°F
- Max Temp : 25°C/77°F
To plant watercress seed ...
- Sow on very moist soil.
- Press seeds into surface.
- Keep constantly damp.
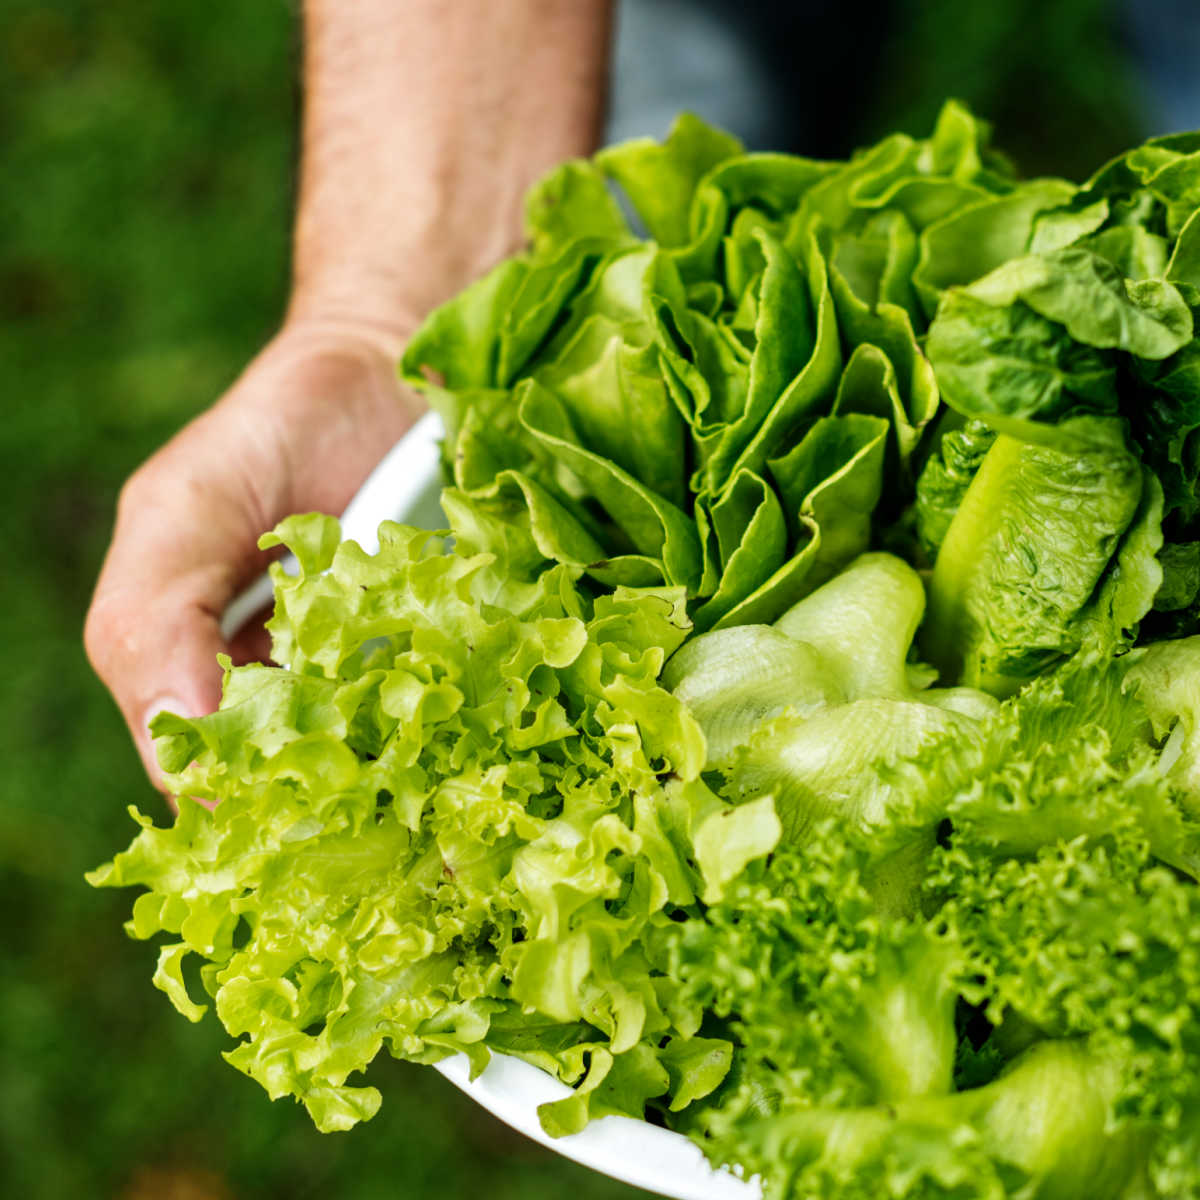
Lettuces
Loose leaf and mini lettuces are ready to harvest in as little as a month and you can eat thinned out seedlings even earlier. Five of the best quick growing lettuce varieties are :
- Black Seeded Simpson
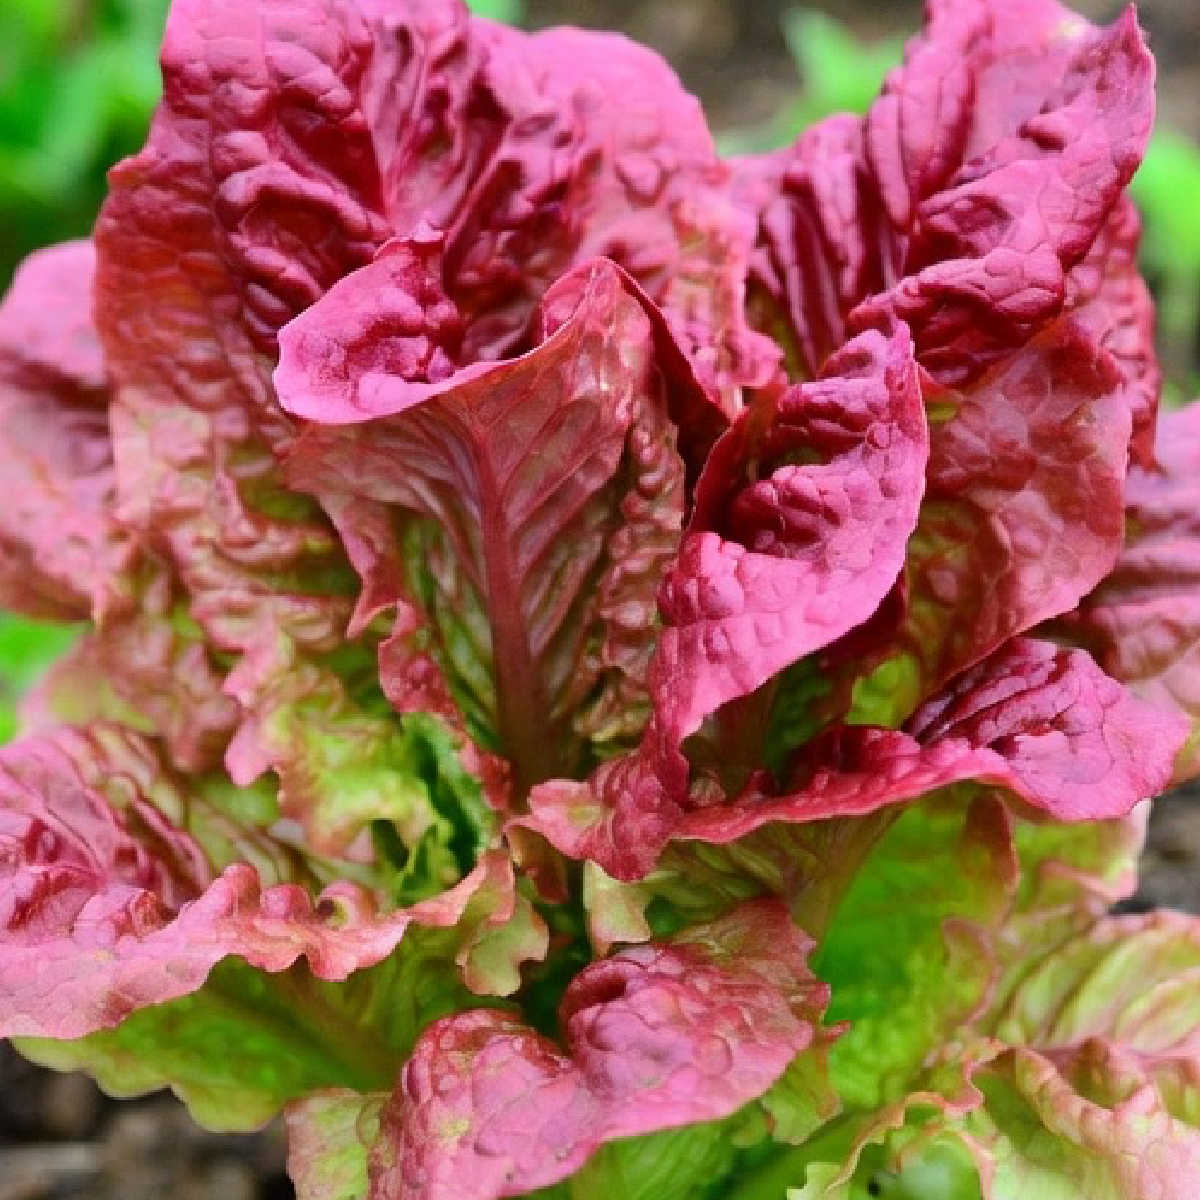
- Red Sails
- Lollo Rosso
- Oakleaf
- Little Gem
To plant lettuce seeds :
- Sow seeds ¼ inch deep in moist soil.
- Space seeds a few inches apart.
- Sow a week's harvest - e.g. 4 or 5 lettuces - weekly for a month for a constant cut-and-come-again harvest.
Black Seeded Simpson
Black Seeded Simpson is a crisp green, fast-growing and heat-tolerant loose leaf lettuce to cut-and-come-again.
- Germinate : 7-10 days
- Harvest : 21-28 days
- Min Temp : 10°C/50°F
- Max Temp : 24°C/75°F
Red Sails
Red Sails is a ruffled red-tinged looseleaf lettuce with mild flavour.
- Germinate : 7-10 days
- Harvest : 20-30 days
- Min Temp : 10°C/50°F
- Max Temp : 24°C/75°F
Lollo Rosso
Lollo Rosso is a curly red-fringed looseleaf lettuce, that adds texture and colour to salads.
- Germinate : 7-10 days
- Harvest : 25-30 days
- Min Temp : 10°C/50°F
- Max Temp : 21°C/70°F
Oakleaf
Oakleaf lettuce has tender, sweet loose leaves shaped rather like oak leaves. It comes in green and red varieties.
- Germinate : 7-10 days
- Harvest : 30 days
- Min Temp : 10°C/50°F
- Max Temp : 24°C/75°F
Little Gem
Little Gem are compact mini romaine lettuces with crisp sweet hearts ideal for salads or grilling.
- Max Temp : 24°C/75°F
- Germinate : 7-10 days
- Harvest : 30 days
- Min Temp : 10°C/50°F
More Quick Growing Salad Leaves
You can grow too much lettuce as I learned the hard way! So for greater variety, do plant some other quick growing salad leaves such as :
- Baby Spinach
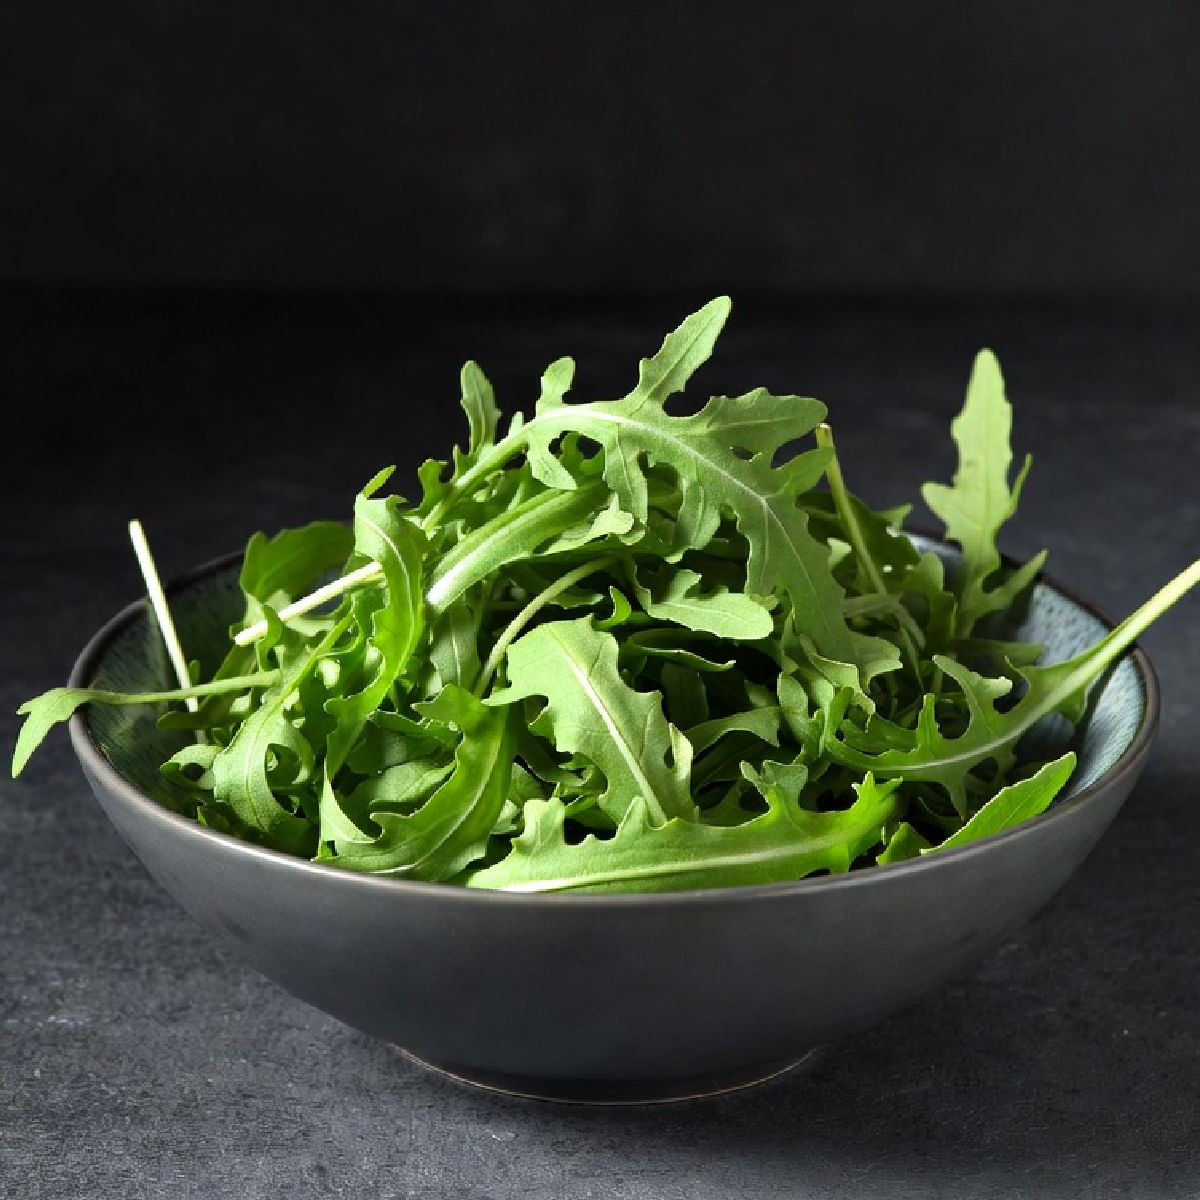
- Rocket (Arugula)
- Mizuna & Mibuna
Baby Spinach
Soft, rich green leaves ideal for salads, curries, pies and pasta dishes.
- Germinate : 5-10 days
- Harvest : 28 days
- Min Temp : 10°C/50°F
- Max Temp : 20°C/68°F
To grow baby spinach leaves quickly
- Don't pre-warm soil, prefers cool.
- Soak seeds for 12 hours.
- Sow 1.5cm deep.
- Space/thin seeds 3-5cm apart.
For more tips check out this big guide to Growing Spinach.
Rocket (Arugula)
Peppery, nutty leaves perfect for salads, pizza, pesto and sandwiches.
- Germinate : 4-7 days
- Harvest : 21 days
- Min Temp : 10°C/50°F
- Max Temp : 25°C/77°F
To grow baby rocket leaves quickly :
- Warm soil if below 10°C.
- Sow 0.5cm deep.
- Broadcast sow lightly over bed.
Mizuna & Mibuna
Mild, slightly peppery Japanese greens for salads, noodles and light stir-fries.
- Germinate : 3-5 days
- Harvest : 21 days
- Min Temp : 10°C/50°F
- Max Temp : 25°C/77°F
To grow mizuna and mibuna quickly :
- Pre-warm soil in early spring.
- Sow 0.5cm deep.
- Space 10cm apart.
Baby Roots With Edible Leaves
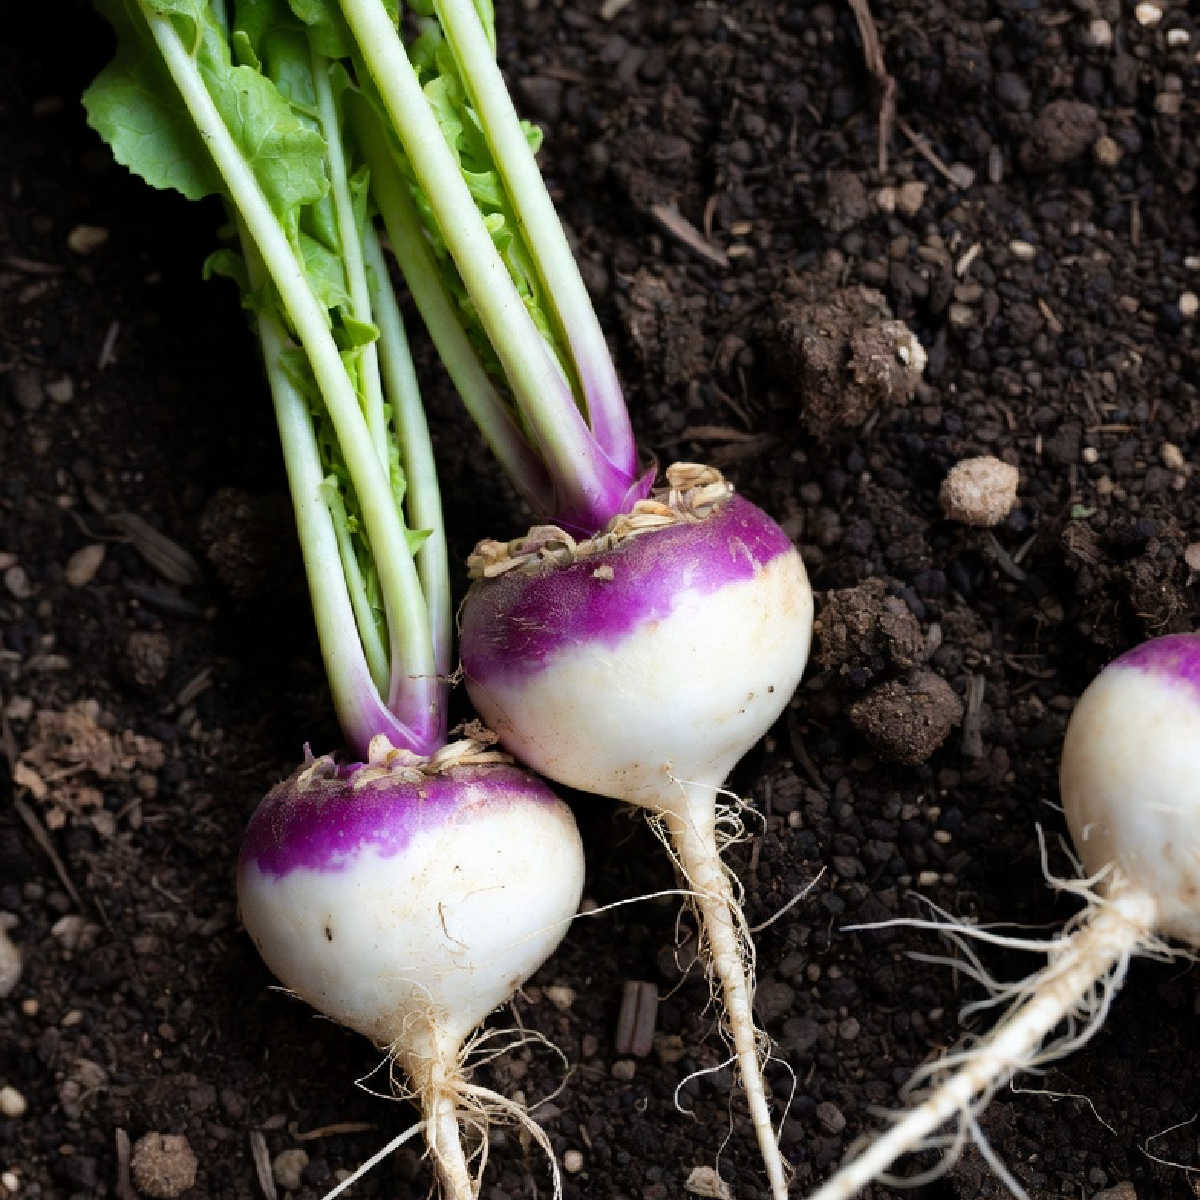
Baby roots offer a double whammy as a quick growing vegetable because you can eat both the roots and the leaves. Including small roots in your vegetable bed also helps to keep a better balance in your vegetable bed. So give these a go :
- Radish
- Turnip Greens
- Beet Greens
- Mustard Greens
Radish
Crisp, juicy roots with a peppery crunch, ideal for salads, pickles and fresh spring dishes.
- Germination : 4-7 days
- Harvest : 21 days
- Min Temp : 15°C/59°F
- Max Temp : 25°C/77°F
Choose small varieties for rapid growth. To sow radishes :
- Pre-warm soil in early spring.
- Sow 1 cm deep.
- Space 2.5–5 cm apart.
Turnip Greens
The earthy, slightly spicy leaves of baby turnips are best suited to sautés with garlic and butter and garlicky soups. You can leave the turnip root in place and keep picking some baby leaves from each root as a cut and come again crop.
But baby turnip roots are themselves surprisingly delicious when roasted lightly.
- Germinate : 3-7 days
- Harvest : 25 days (baby leaves)
- Min Temp : 15°C/59°F
- Max Temp : 30°C/86°F
- Sow 1 cm deep.
- Sow/thin to 20 cm apart for baby turnip roots.
- Or 10cm apart for leaves only.
Beet Greens
The sweet, earthy leaves of baby beetroots are excellent for steaming, sautéing and adding colour to salads. Keep harvesting baby leaves as a cut and come again crop but don't take all the leaves from a single root.
As seedlings grow bigger, thin them out and enjoy deliciously tiny roast beetroots.
- Germinate : 5-10 days
- Harvest : 25 days (baby leaves)
- Min Temp : 10°C/50°F
- Max Temp : 30°C/86°F
- Soak seeds for 12 hours.
- Pre-warm soil to 15°C.
- Sow 2 cm deep.
- Sow/thin to 10cm for tiny baby beets.
Beet greens like spinach are high in anti-nutrient oxalates. If you struggle with oxalates, blanch the leaves well and discard the water or grow mustard and turnip greens that are a much lower oxalate leafy green alternative.
Mustard Greens
Quick growing mustard greens pack a healthy punch with good helpings of vitamin C, K and beta-carotene. Like turnip greens they have a strong taste - peppery and slightly bitter - but this mellows wonderfully when cooked with garlic or braised with pork dishes.
Mustard roots have, like their seeds, got a powerful kick and can be used similarly and in similar quantities to horseradish.
- Germinate : 5-10 days
- Harvest : 21 days (baby leaves)
- Min Temp : 10°C/50°F
- Max Temp : 25°C/77°F
- Sow 1cm deep.
- Sow in a small area.
- You can slow most of your seeds close together as you really are growing for leaves not roots.
Garden mustard is not invasive like wild garlic mustard but can be a bit of a bully in the vegetable garden so don't sow too much.
Cabbages & Brassicas
Cabbages and other brassicas do take a little longer to grow but these quick growing varieties will still be ready in 30 days and will be much quicker when they grow back again after the first harvest :
- Spring Cabbage
- Pointed Cabbage
- Cavolo Nero
- Tatsoi
- Pak Choi
Spring Cabbage
Tender, mild leaves suited to steaming, shredding and classic spring dishes.
- Germinate : 5-10 days
- Harvest : 30 days
- Min Temp : 15°C/59°F
- Max Temp : 25°C/77°F
- Soak seeds for 6-12 hours.
- Warm soil pre-planting.
- Sow 1 cm deep.
- Space 10-15cm apart.
For more tips check out this big guide to Growing Spring Greens.
Pointed Cabbage
Sweet, compact leaves great for slaws, steaming and light sautéing.
- Germinate : 5-10 days
- Harvest : 30 days
- Min Temp : 15°C/59°F
- Max Temp : 25°C/77°F
- Soak seeds for 6-12 hours.
- Warm soil pre-planting.
- Sow 1 cm deep.
- Space 10-15cm apart.
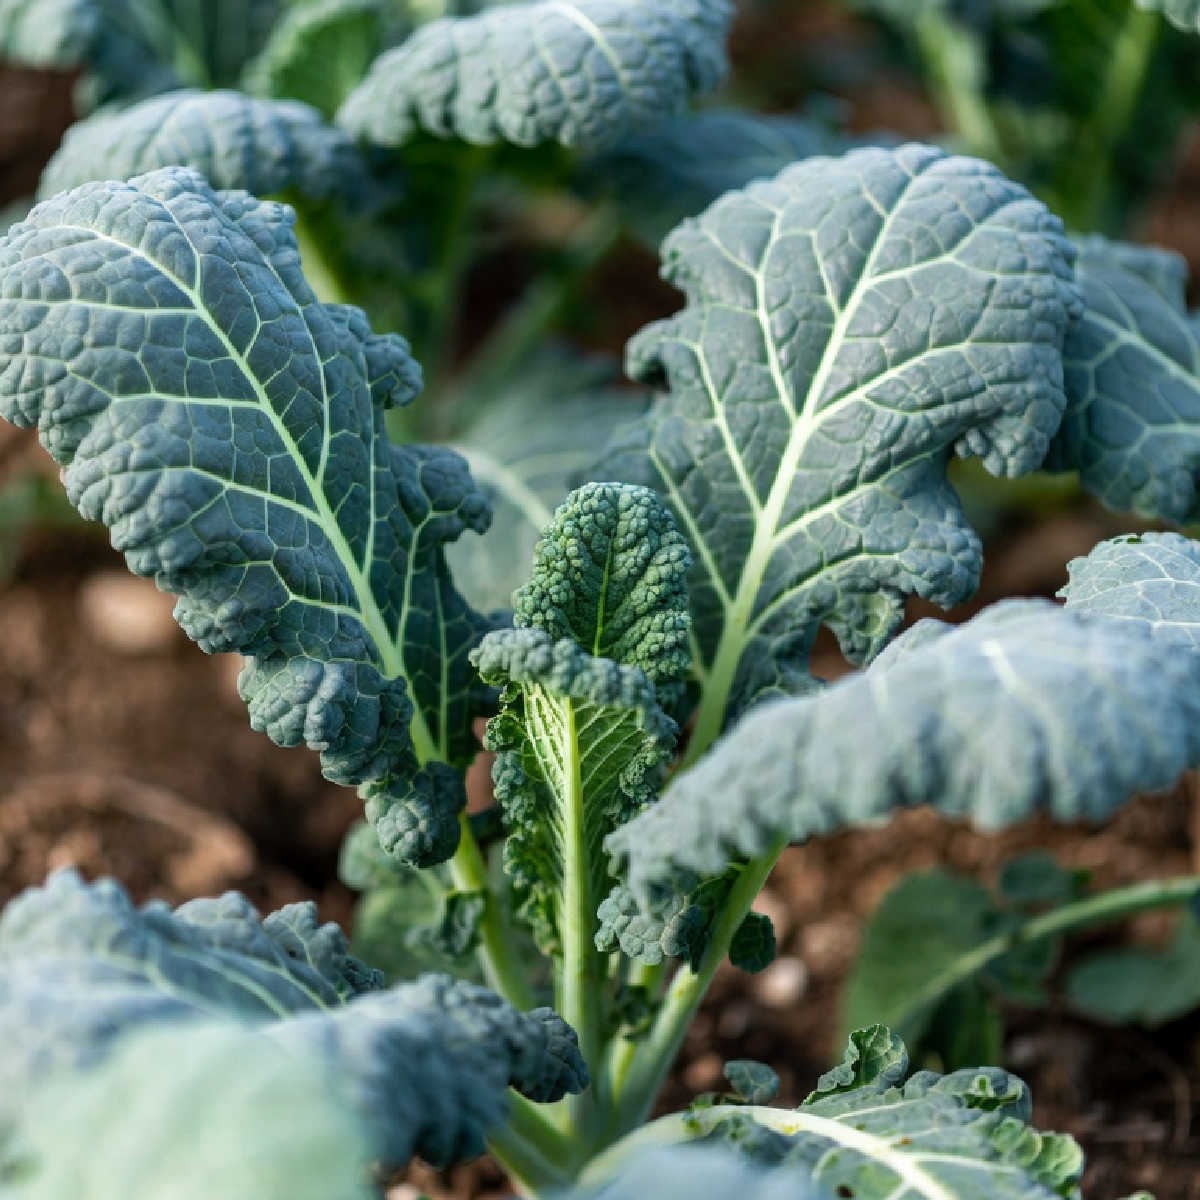
Cavolo Nero
Dark, richly flavoured leaves ideal for soups, pasta and hearty dishes.
- Germinate : 5-10 days
- Harvest : 30 days
- Min Temp : 15°C/59°F
- Max Temp : 25°C/77°F
- Warm soil for better germination rate.
- Soak seeds for 12 hours.
- Sow 1 cm deep, 8-10cm apart.
Tatsoi
Tender spoon-shaped leaves with mild mustard flavour for salads and stir-fries.
- Germinate : 3-5 days
- Harvest : 25 days
- Min Temp : 15°C/59°F
- Max Temp : 25°C/77°F
- Warm soil pre-sowing for rapid start.
- Sow densely 1cm deep.
- Space 5-10cm apart for baby leaves.
Pak Choi

Pak-choi has crisp stems and tender leaves perfect for stir-fries, soups and Asian dishes.
- Germinate : 3-5 days
- Harvest : 30 days
- Min Temp : 15°C/59°F
- Max Temp : 25°C/77°F
- Pre-warm soil to prevent bolting in cold.
- Sow 1cm deep.
- Space 10-15cm apart.
And there you go. 20 of the very quickest growing vegetables for your vegetable garden.
For more vegetable growing tips check out my other grow-your-own posts and follow me on Pinterest
Original image sources: Fresh young spinach leaves on a white background, Pieces of chopped beet and whole beet on white background, Fresh wet spinach with water drops & Salad mix with rucola, frisee and radicchio / Gemischter Salat by Marco Verch under Creative Commons 2.0
Simple Spiritual Self Care Tips


101 Free Things To Do In London


How To Grow Thyme Inside & Outdoors

Thyme is super easy to grow from cuttings and seeds both in pots indoors and outside in a little herb garden for a constant supply of fresh herbs.
And in this post I will share everything you need to know to help your thyme thrive including how to water, prune and harvest thyme PLUS the best companion plants for thyme in vegetable gardens and flower beds.
Table of Contents
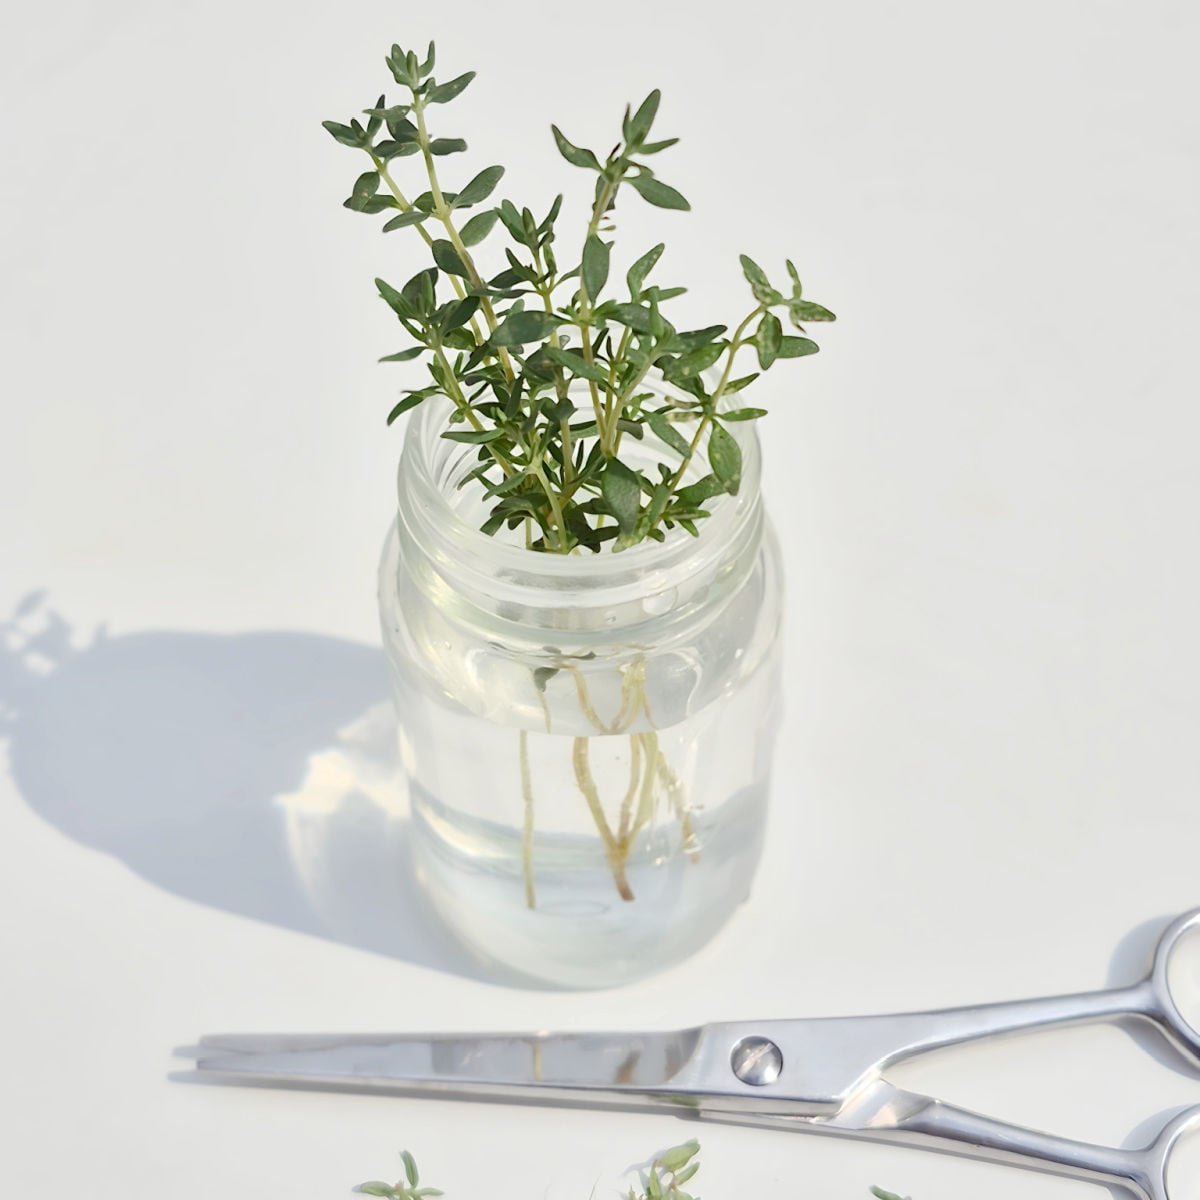
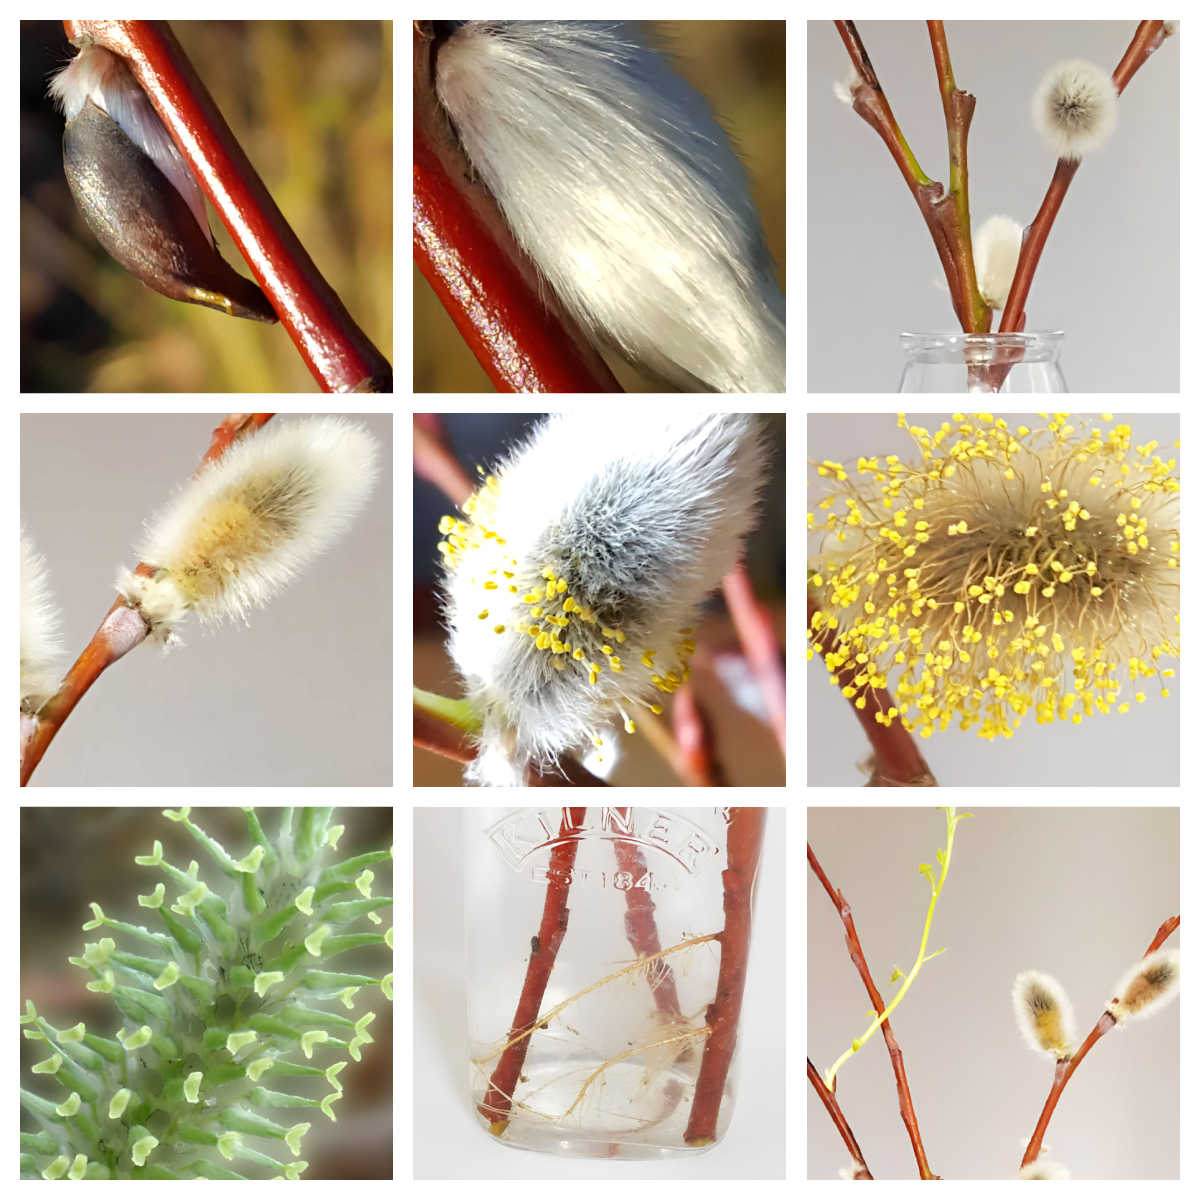
Growing Thyme From Cuttings
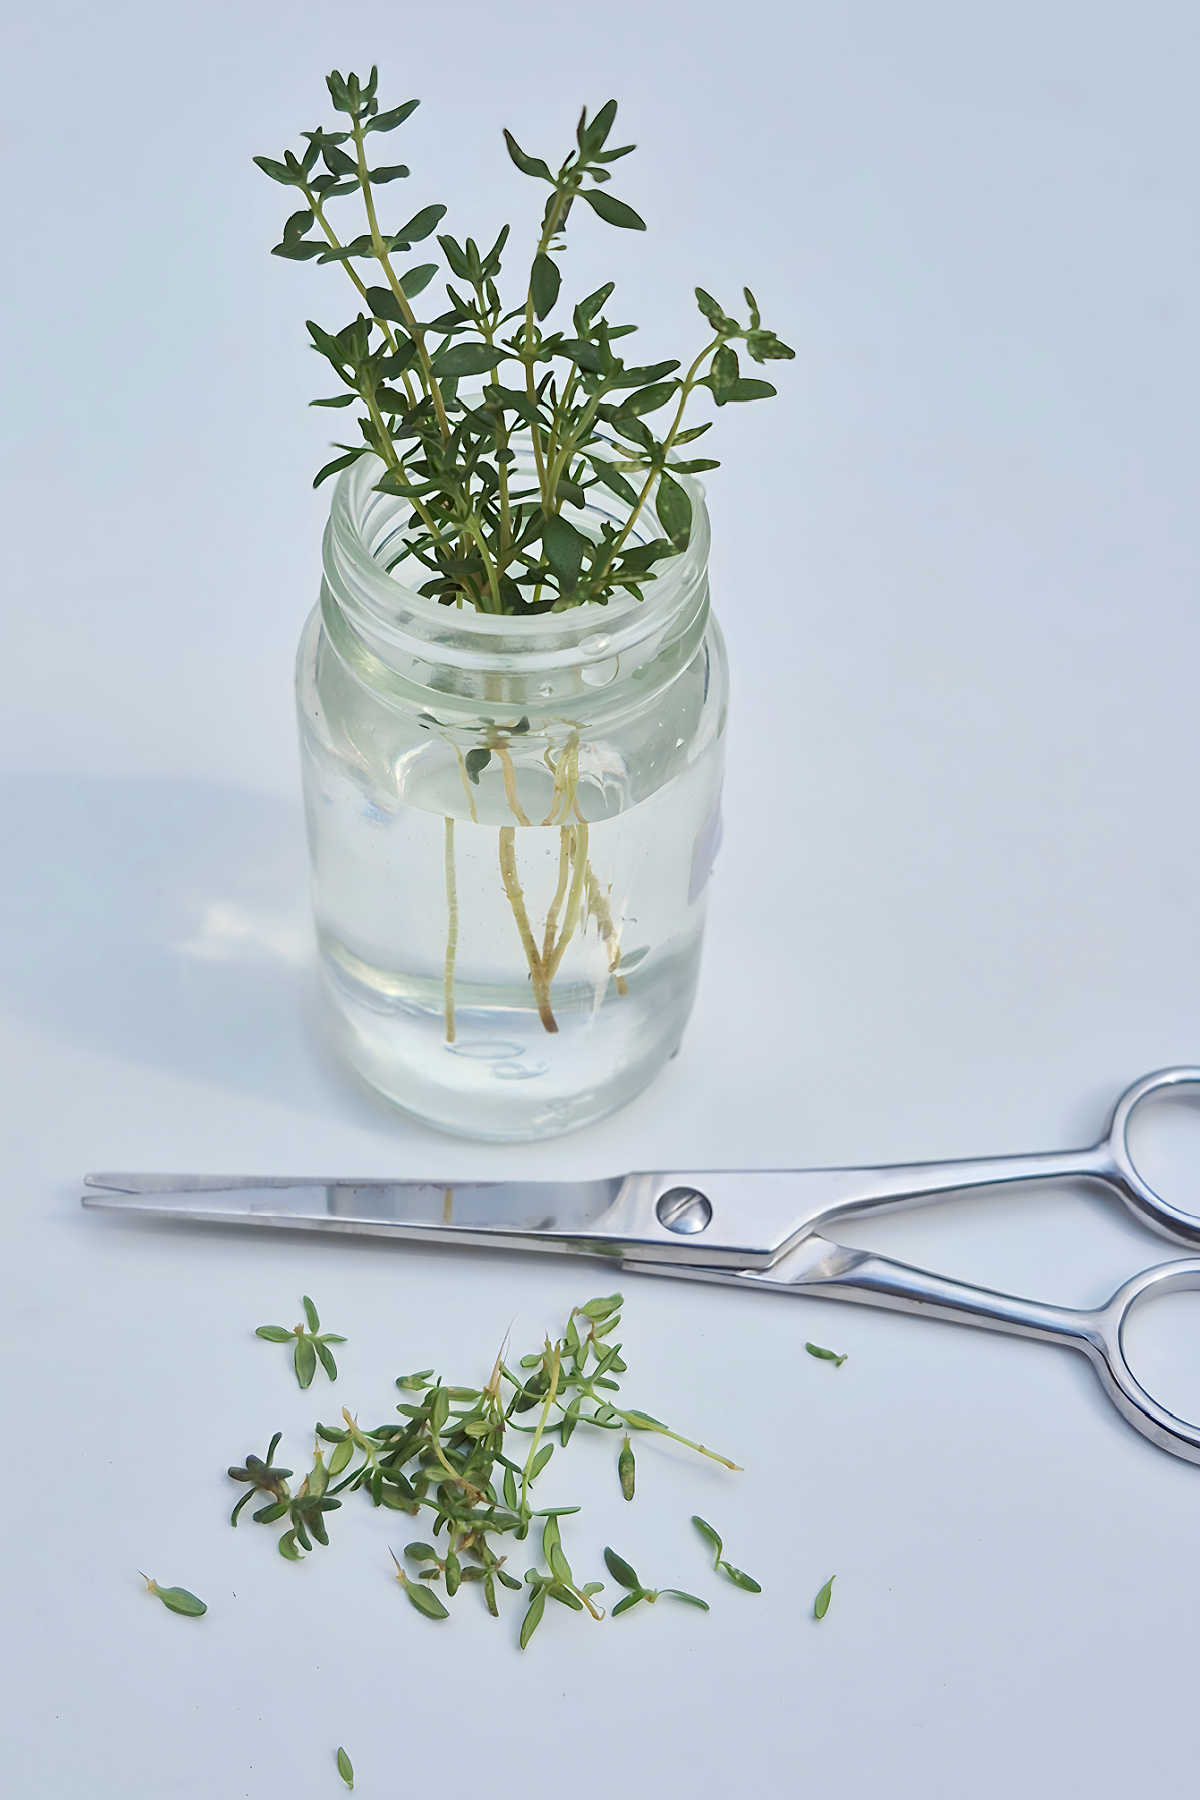
The quickest and easiest way to grow thyme for your herb garden is from cuttings in water. Thyme will not grow as quickly from cuttings as mint or oregano but you will still have a small plant with roots in 2 to 3 weeks, so it is quicker than growing thyme from seed.
All you need to do to grow thyme from cuttings in water is :
- Take a few 3-5 inch cuttings from a thyme growing neighbour.
- Cut just below a point where leaves are sprouting (a leaf node).
- Avoid any very woody or very young weak stems.
- Remove the lower leaves.
- Put cuttings in a jar of water.
- Keep in a sunny warm spot.
- After 1-2 weeks roots will start to appear from old leaf nodes.
- After 3 weeks roots will be long & strong enough to be planted.
You can now transplant your thyme into containers or an outdoor herb garden.
Growing Thyme Indoors
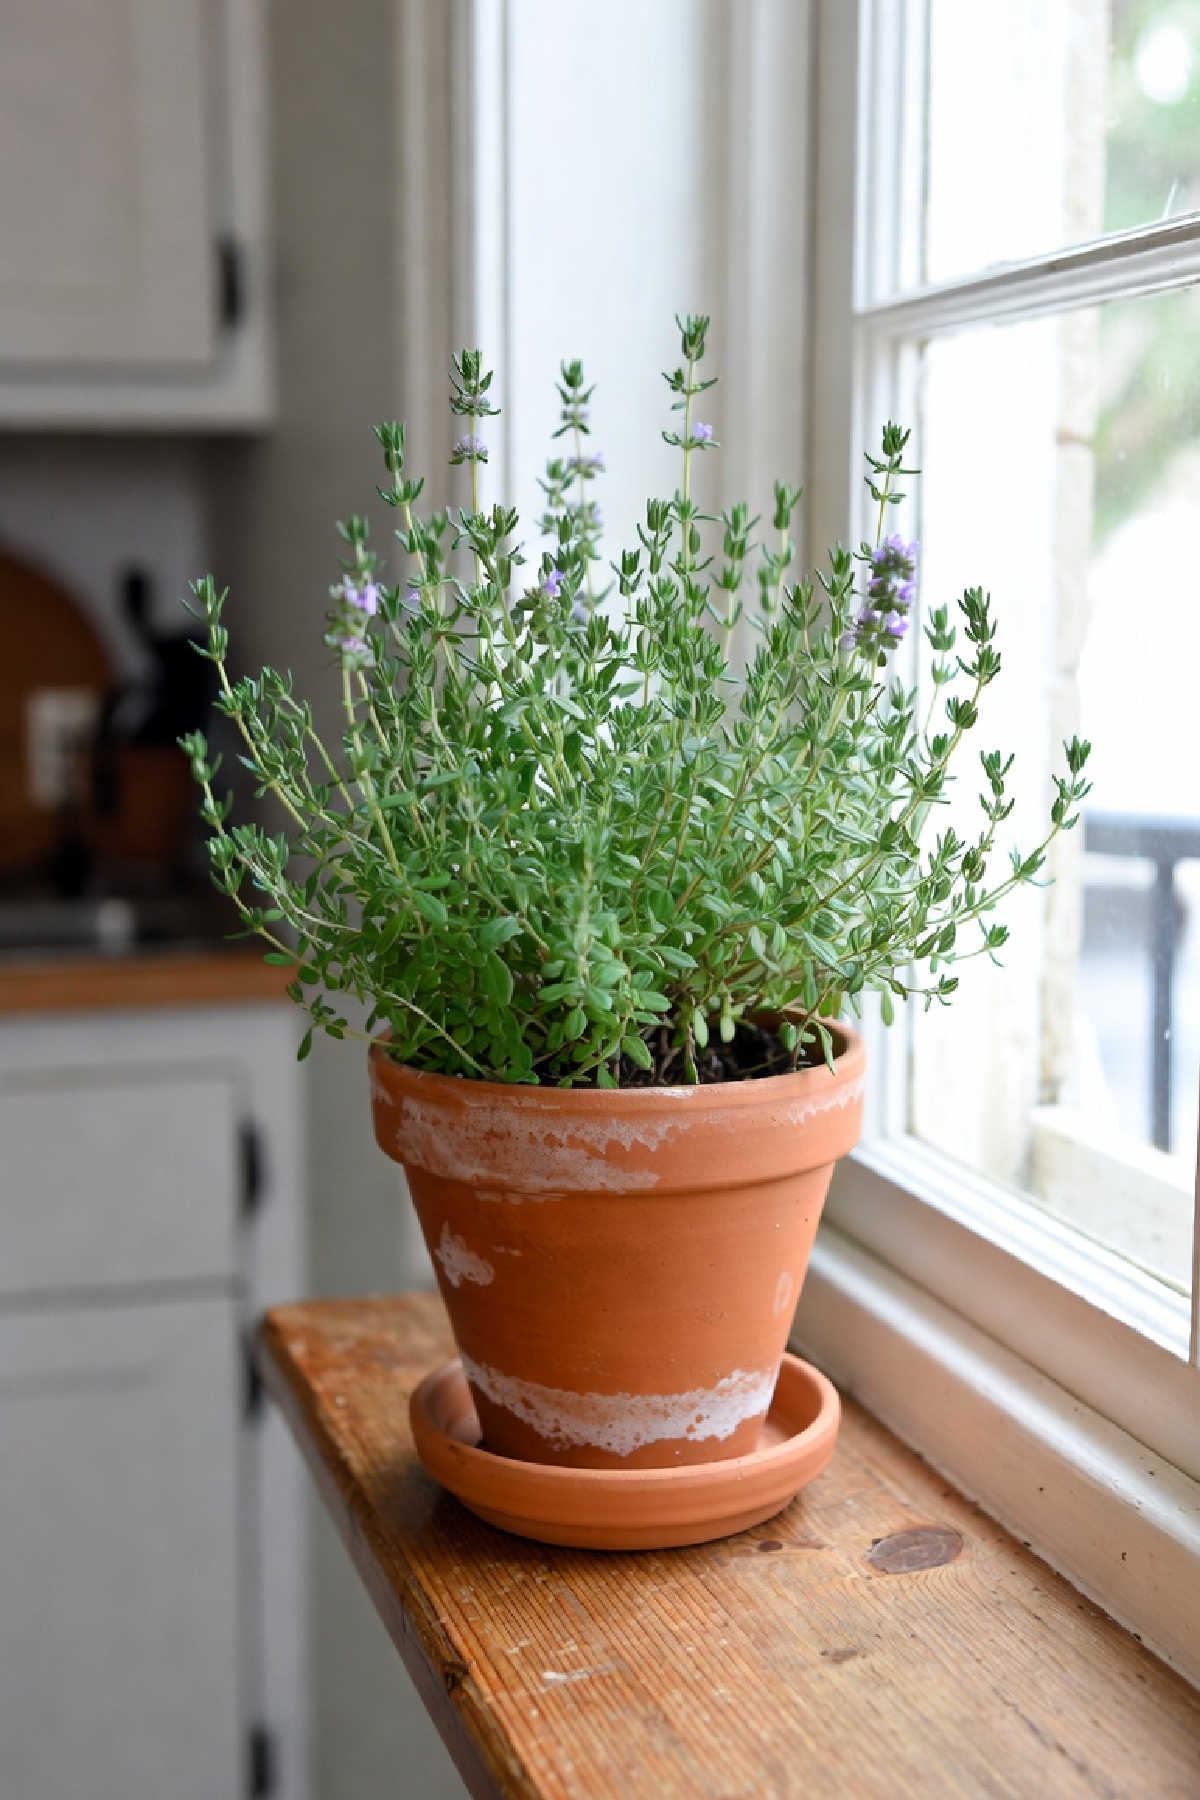
Thyme is very easy to grow indoors as it is one of the smaller herbs. It also likes warmth so will flourish indoors when too cold for it outdoors.
To grow thyme indoors successfully:
- Start thyme from cuttings.
- Transfer to small pot of soil with stones at bottom so drains well.
- Place in a sunny spot.
- Will flourish as long as temperature between 16c / 60 f and 32 c / 90 f.
- Only water when soil is dry.
- Prune all over in early spring and a third of the plant after flowering.
- Divide plants every few years so don't over grow pot.
Growing Thyme From Seed
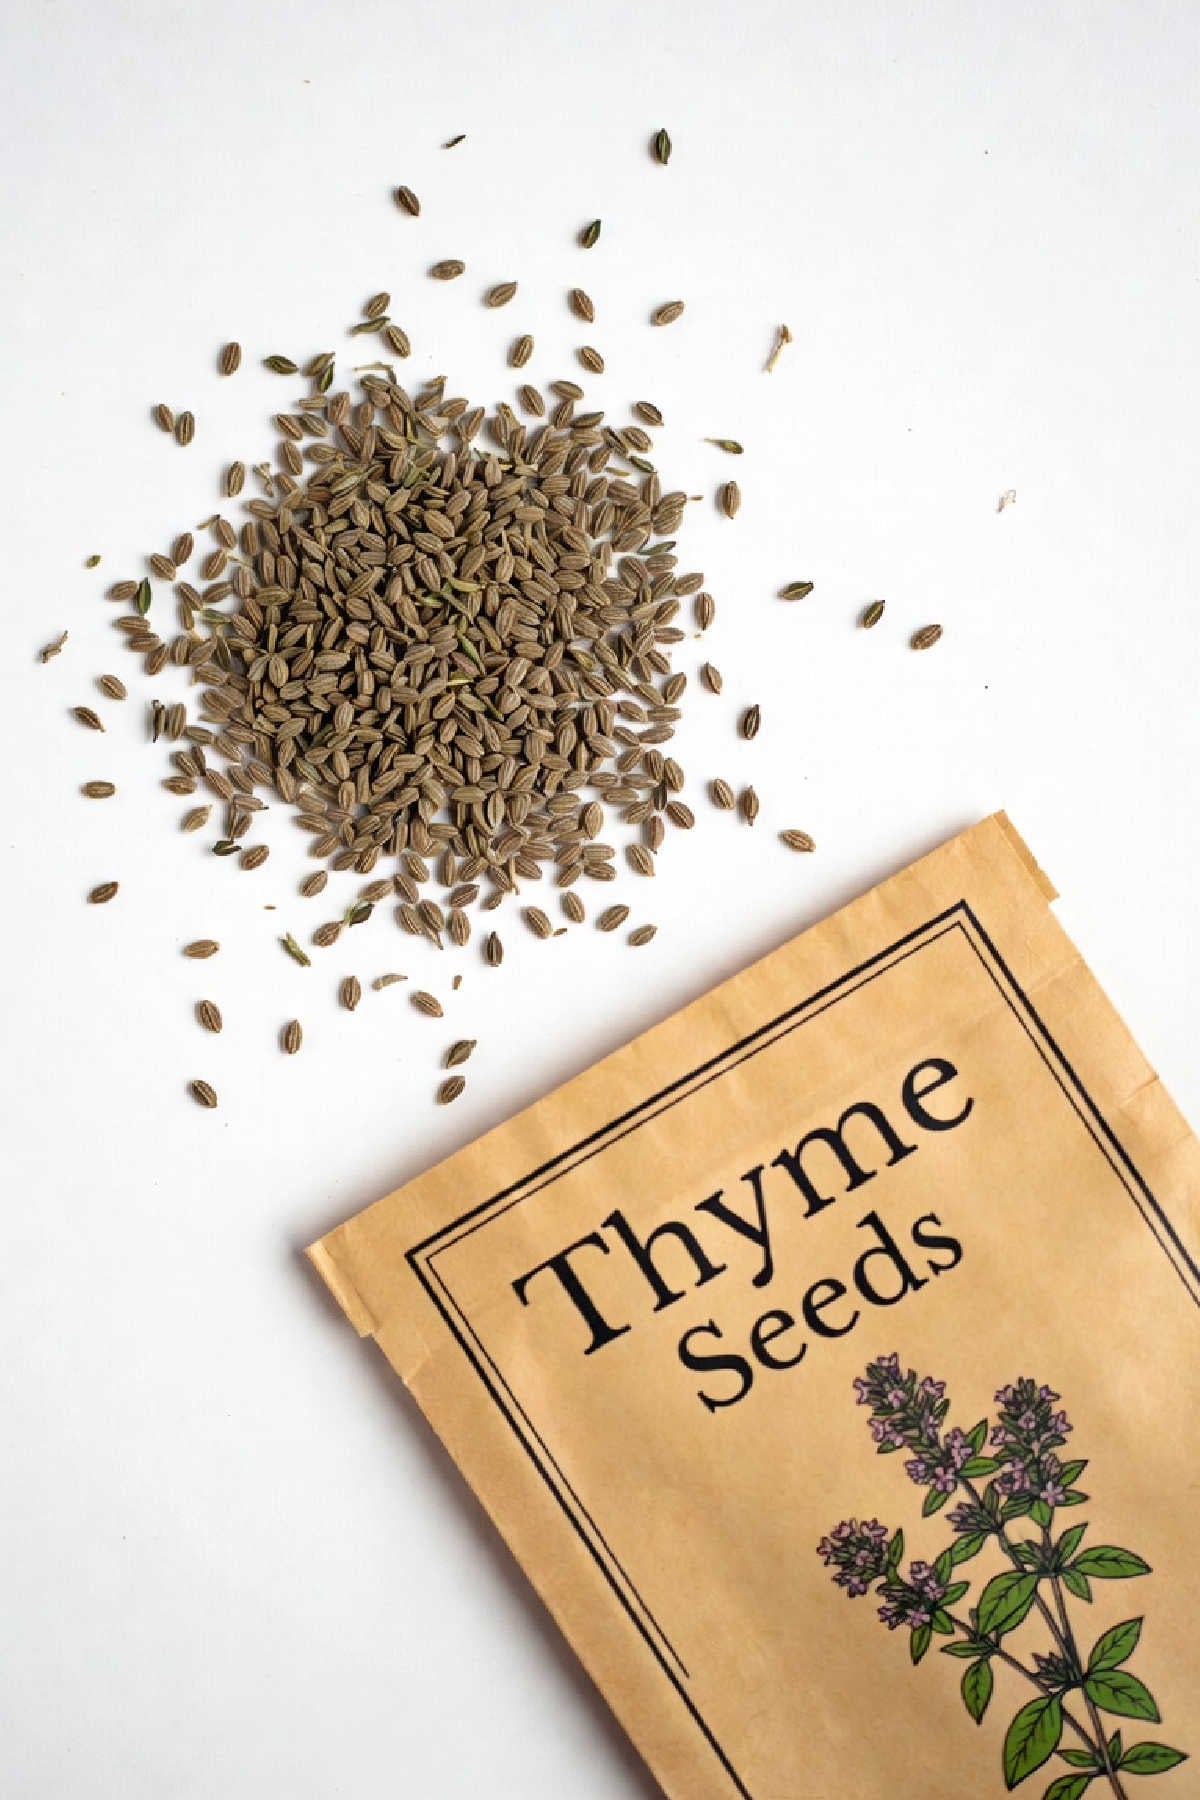
Thyme is easy to grow from seed but it isn't quick. Thyme seeds can take a month to germinate and only germinate reliably above 21c/70f. You will also need to wait until the second year after sowing to actually harvest your thyme!
So you will need to be patient growing thyme from seed. But the great advantage of growing thyme from seed is you can grow the varieties you actually love cooking with. (See Buying Thyme Seeds & Plants below for ideas).
If you do want to grow thyme from seed rather than cuttings :
- Start sowing indoors from late winter to early spring.
- Scatter a few seeds per small pot, cover very lightly with soil.
- Water scarcely.
- Plant out when temperature is consistently above 16c/60f in late spring and early summer.
What Soil Does Thyme Like
Thyme, like oregano, lavender and rosemary, is very happy in poor soil. You can grow thyme in any potting compost you have but it is best to mix in a good helping of grit, sand and pebbles to improve drainage.
Some gardeners recommend a regular seaweed feed for thyme grown in containers. But in my experience nitrogen feeds produce :
- Loss of flavour.
- Thin leggy plants
- Too much soft growth which is vulnerable to bugs.
I recommend instead replacing the top inch of soil every year with a mix of:
- 50% potting soil
- 25% gardeners grit
- 25% sand.
This will ensure key minerals work their way down to the roots all year long. If your thyme leaves do yellow - and aren't a yellow variety - you may need to repot with the mix above to restore nitrogen and magnesium.
How To Water Thyme
Thyme needs very little water and is drought resistant. Thyme will only need watering outdoors if grown in containers. If you are growing thyme indoors or in containers outdoors only water scarcely when the soil is dry.
Don't plant thyme with other herbs that need plenty of water. e.g. mint, parsley & chives. It prefers other drought resistant herbs such as rosemary.
If you are growing thyme in a wetter climate, you may, unusually, want to give it some rain cover, so it doesn't get too wet. Soggy thyme plants can be vulnerable to blight and root rot.
When To Plant Thyme Outdoors
Thyme loves sunshine and warmth so only plant thyme seeds outdoors when the temperature is above 21c/70f. Transplant thyme seedlings outdoors when the temperature is consistently above 16c/60f in late spring and early summer.
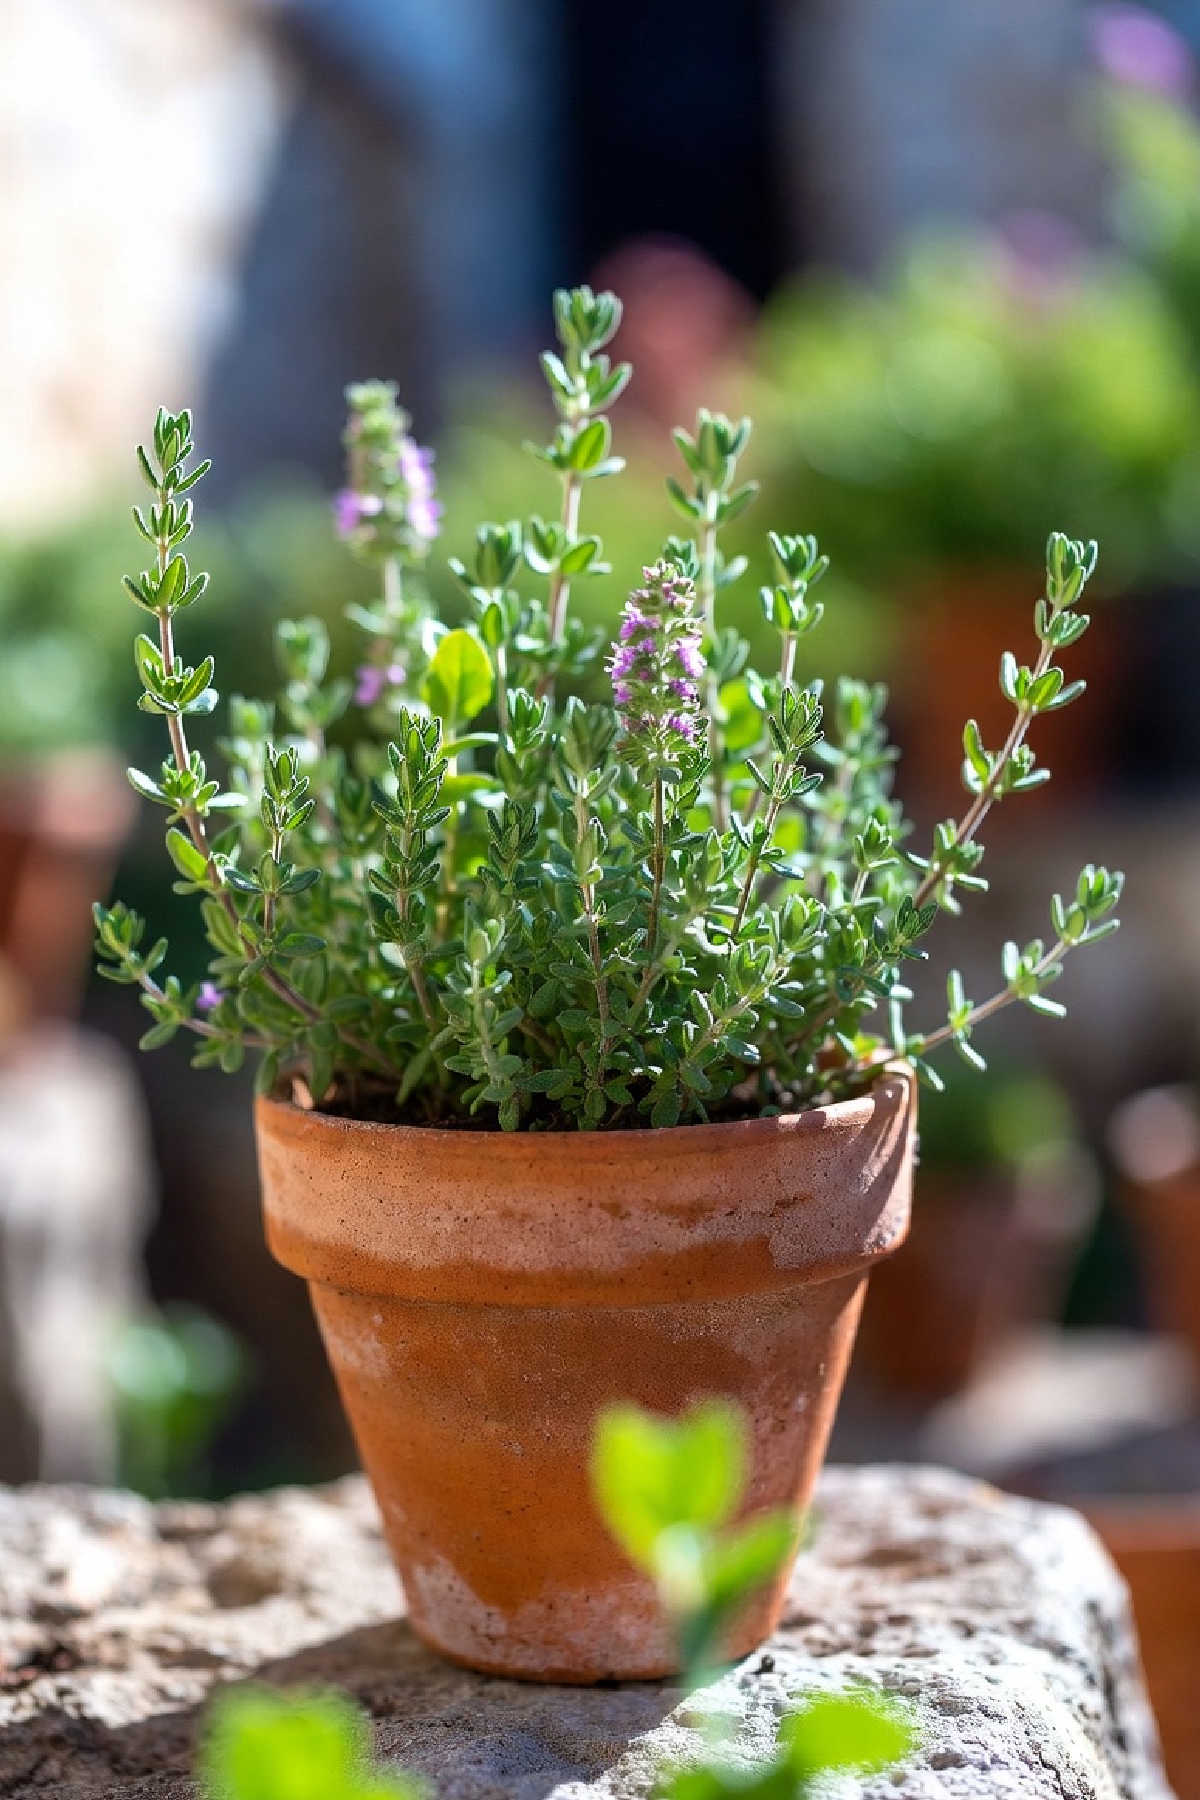
Growing Thyme In Containers
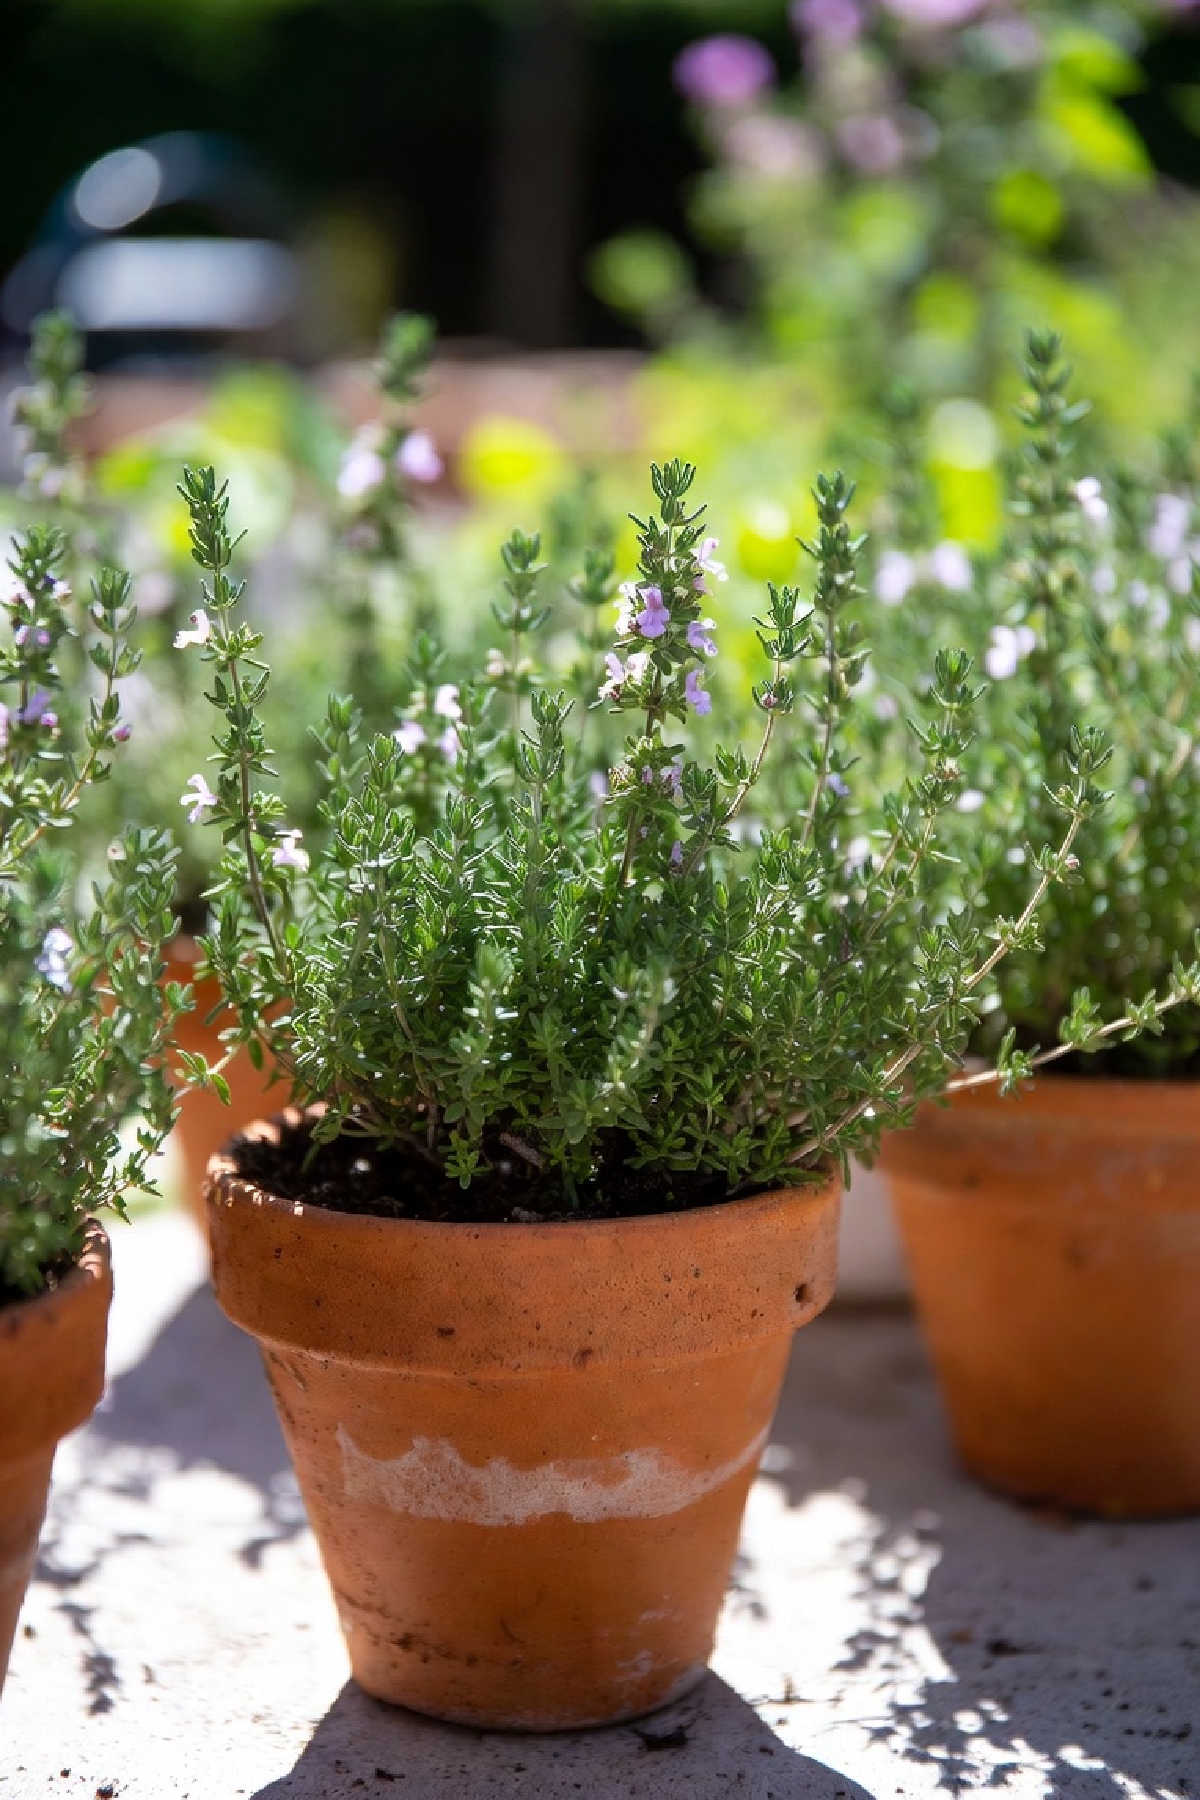
Thyme grows well in containers and pots both indoors and outside. Key tips when growing thyme in pots are:
- Choose clay pots that retain heat.
- Ensure container drains well.
- Add stone or grit to bottom so thyme roots don't sit in water.
- Raise container on a few bricks for even better drainage.
- Divide thyme plants in containers if they out grow the pot.
Thyme plants - unlike rosemary - are best kept small and thyme plants will thrive in small 5 inch (13-17cm) pots. If you plant your cuttings in 4 or 5 small pots you can use your thyme as a helpful companion plant in the vegetable garden to repel bugs.
As discussed above I would avoid feeding thyme plants in pots and just refresh top soil layer when needed.
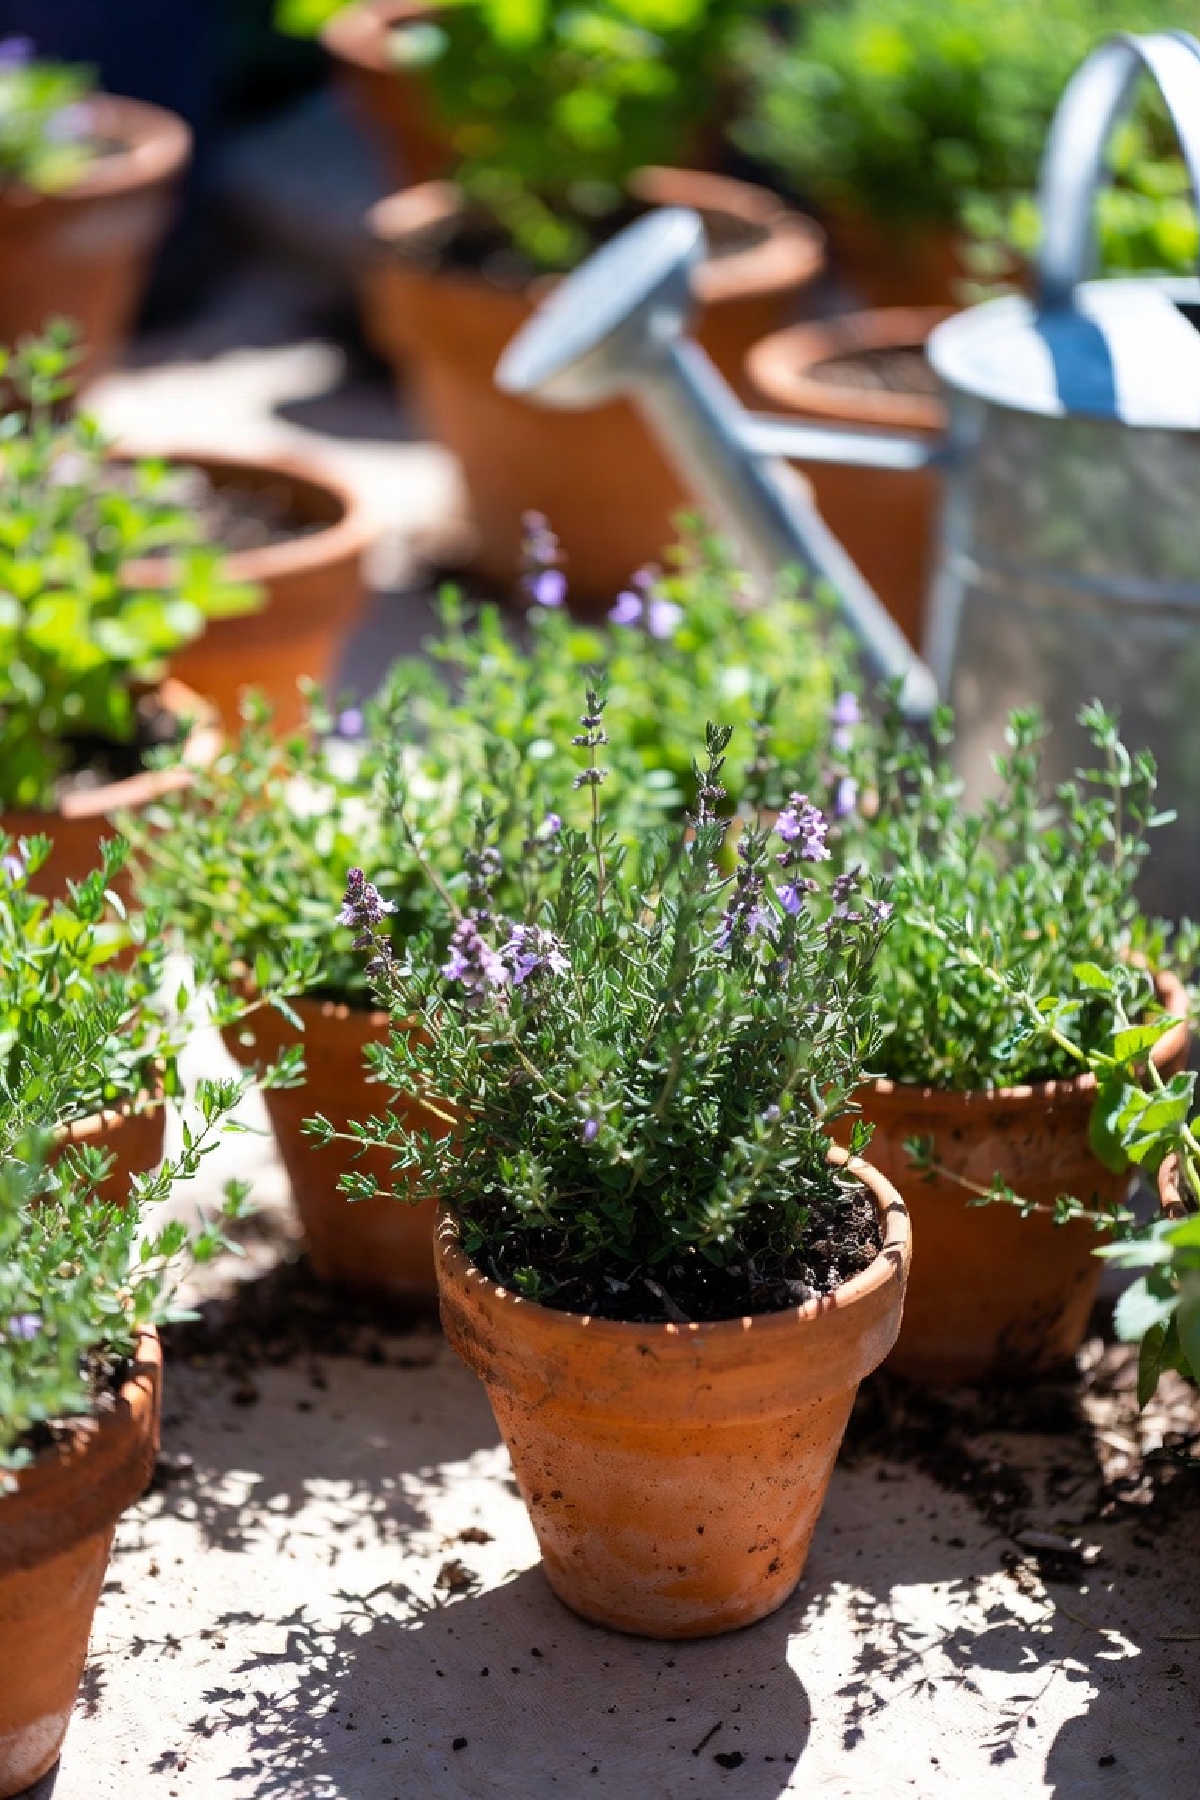
What Does Thyme Grow Well With
Companion Plants
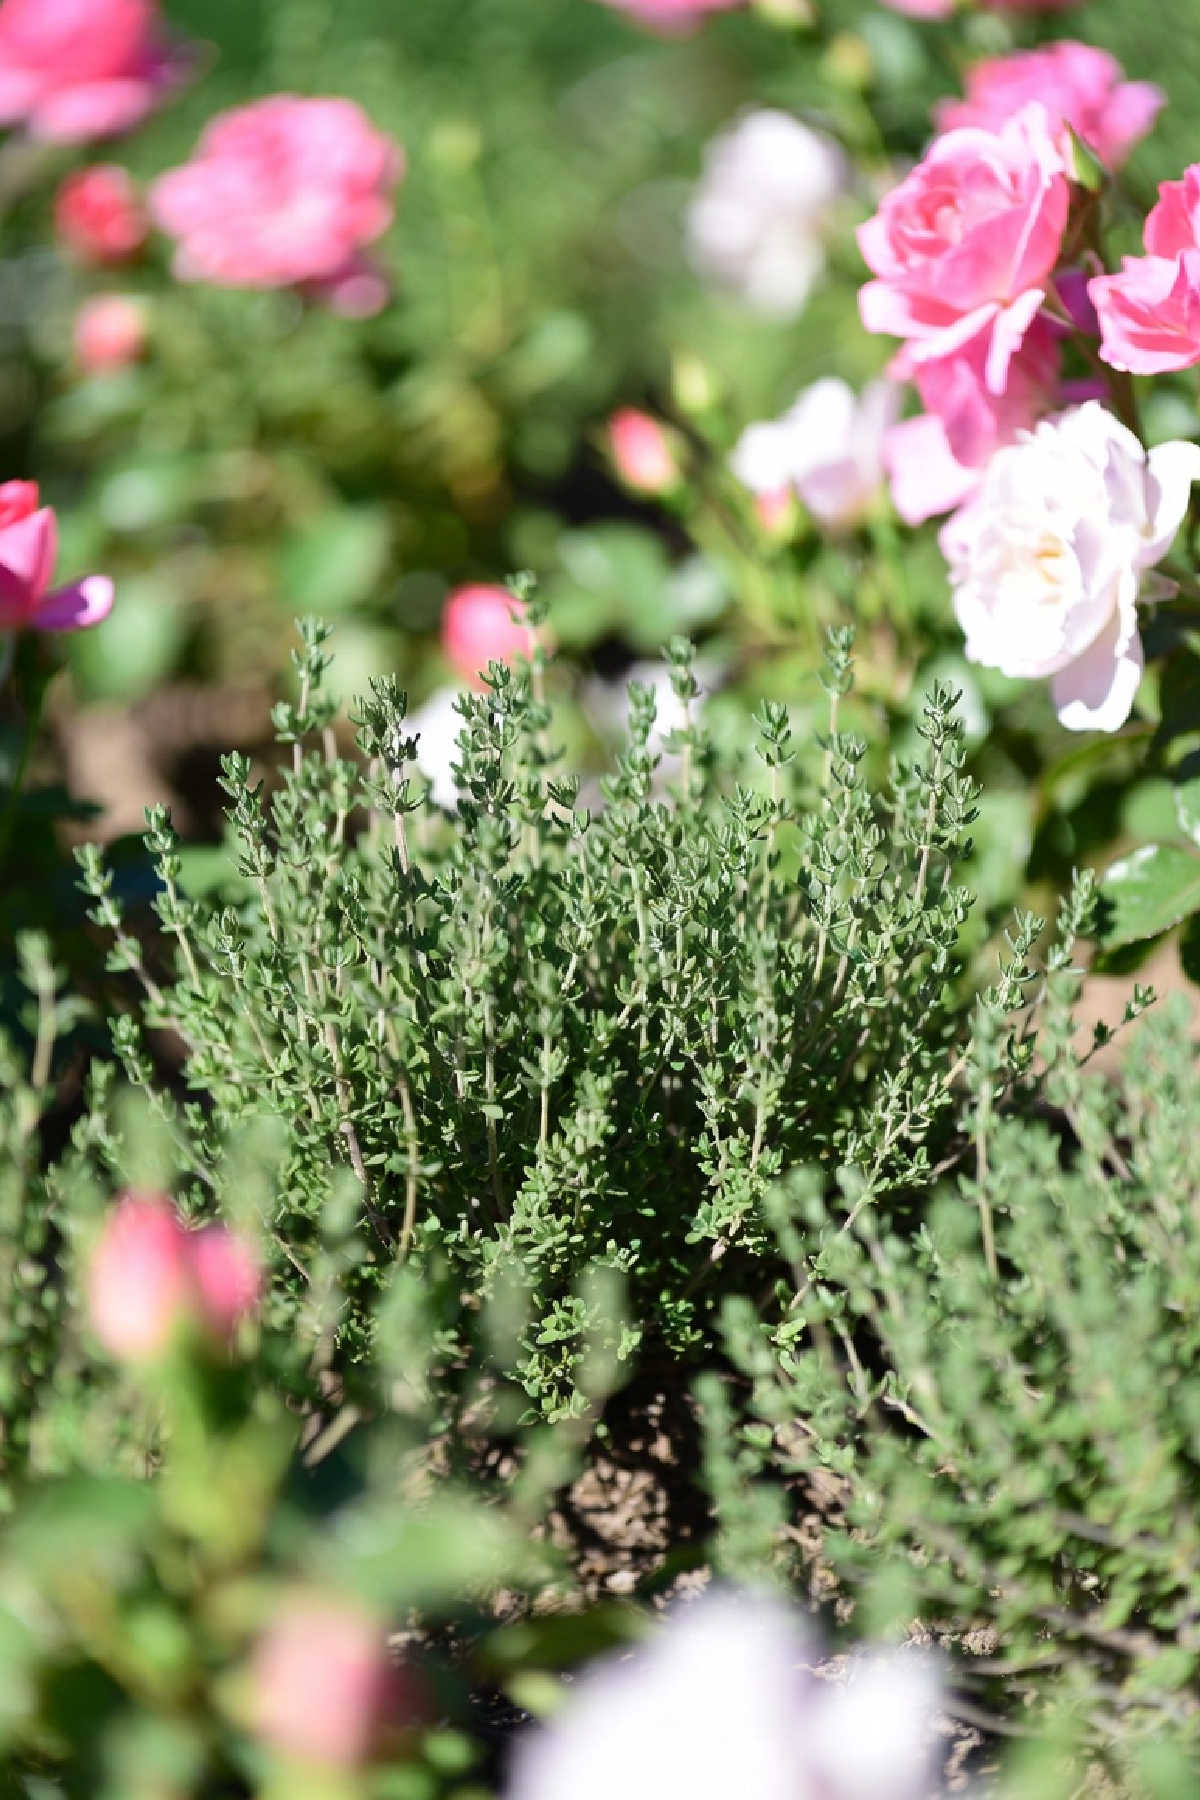
Thyme can be a very useful companion plant in the vegetable, fruit and flower garden as thymol repels a variety of garden pests :
- Cabbage & Collards : cabbage white caterpillars
- Roses : aphids
- Strawberries : slugs & snails
- Tomatoes : whitefly & hornworms
- Aubergine : flea beetles
- Potatoes : potato beetle
- Cucumbers : cucumber beetle
Thyme flowers can also help to attract pollinators to :
- Blueberries
- Chilli & bell peppers
- Raspberries
- Blackberries
- Zucchini.
You can intercrop small thyme plants from cuttings with strawberries and blueberries or as ground cover beneath roses or surround beds with thyme pots or a thyme hedge.
In A Herb Garden
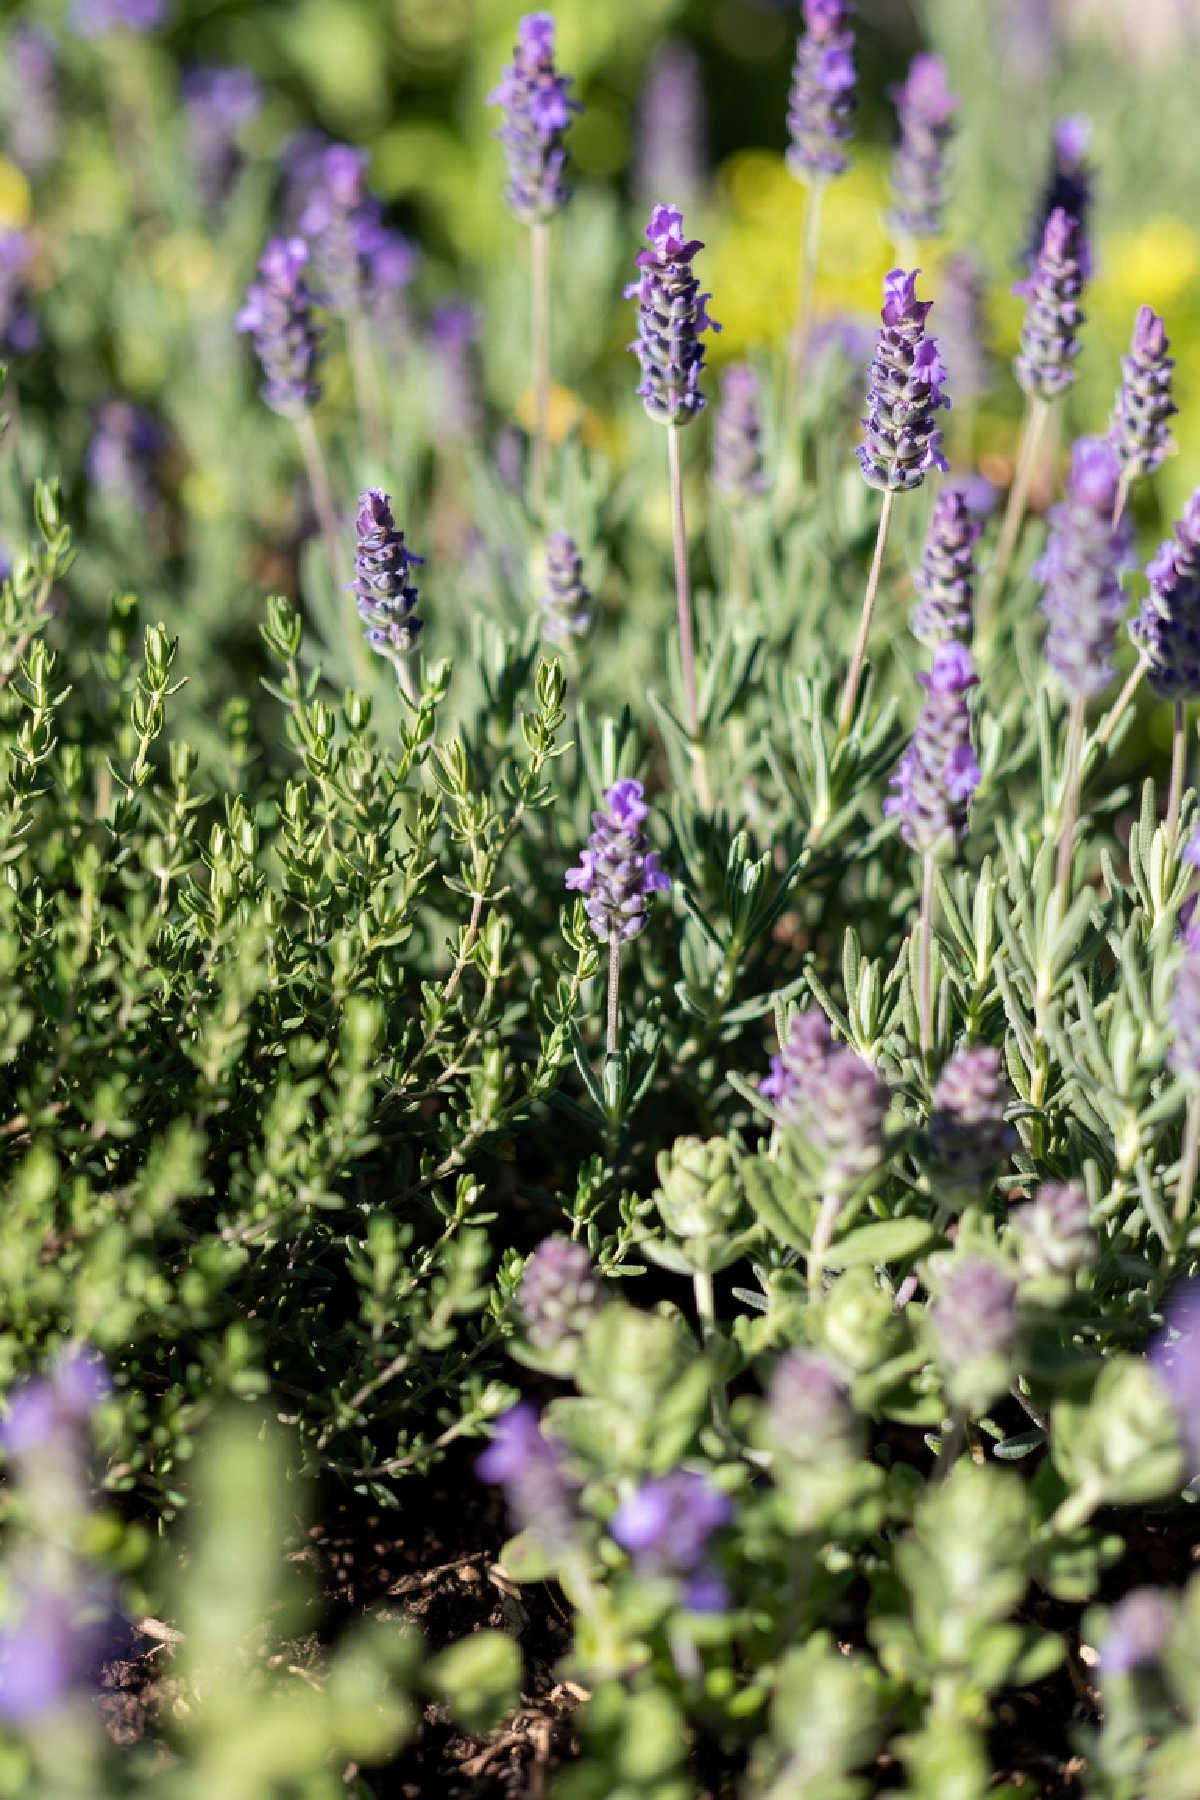
Thyme is a must in any herb garden with its delicious flavouring and multiple health benefits. But that doesn't mean you can shove thyme in a herb garden with lots of other herbs and expect it to thrive, it won't!!
The two key things to remember growing thyme in a herb garden are it:
- Loves hot, sunny, near drought conditions with very little water.
- Is easily suffocated by bigger bullies or faster growing herbs.
The easiest way to grow thyme in a herb garden is in a container where it can do its own thing but if you do want to grow thyme in a herb bed:
- Do NOT plant thyme with water loving herbs such as mint.
- Do NOT plant thyme with large herbs e.g. rosemary or rapidly growing herbs e.g. sage.
- DO plant thyme with other drought resistant herbs that don't grow too big or too quickly such as oregano, lavender and marjoram.
How To Prune Thyme
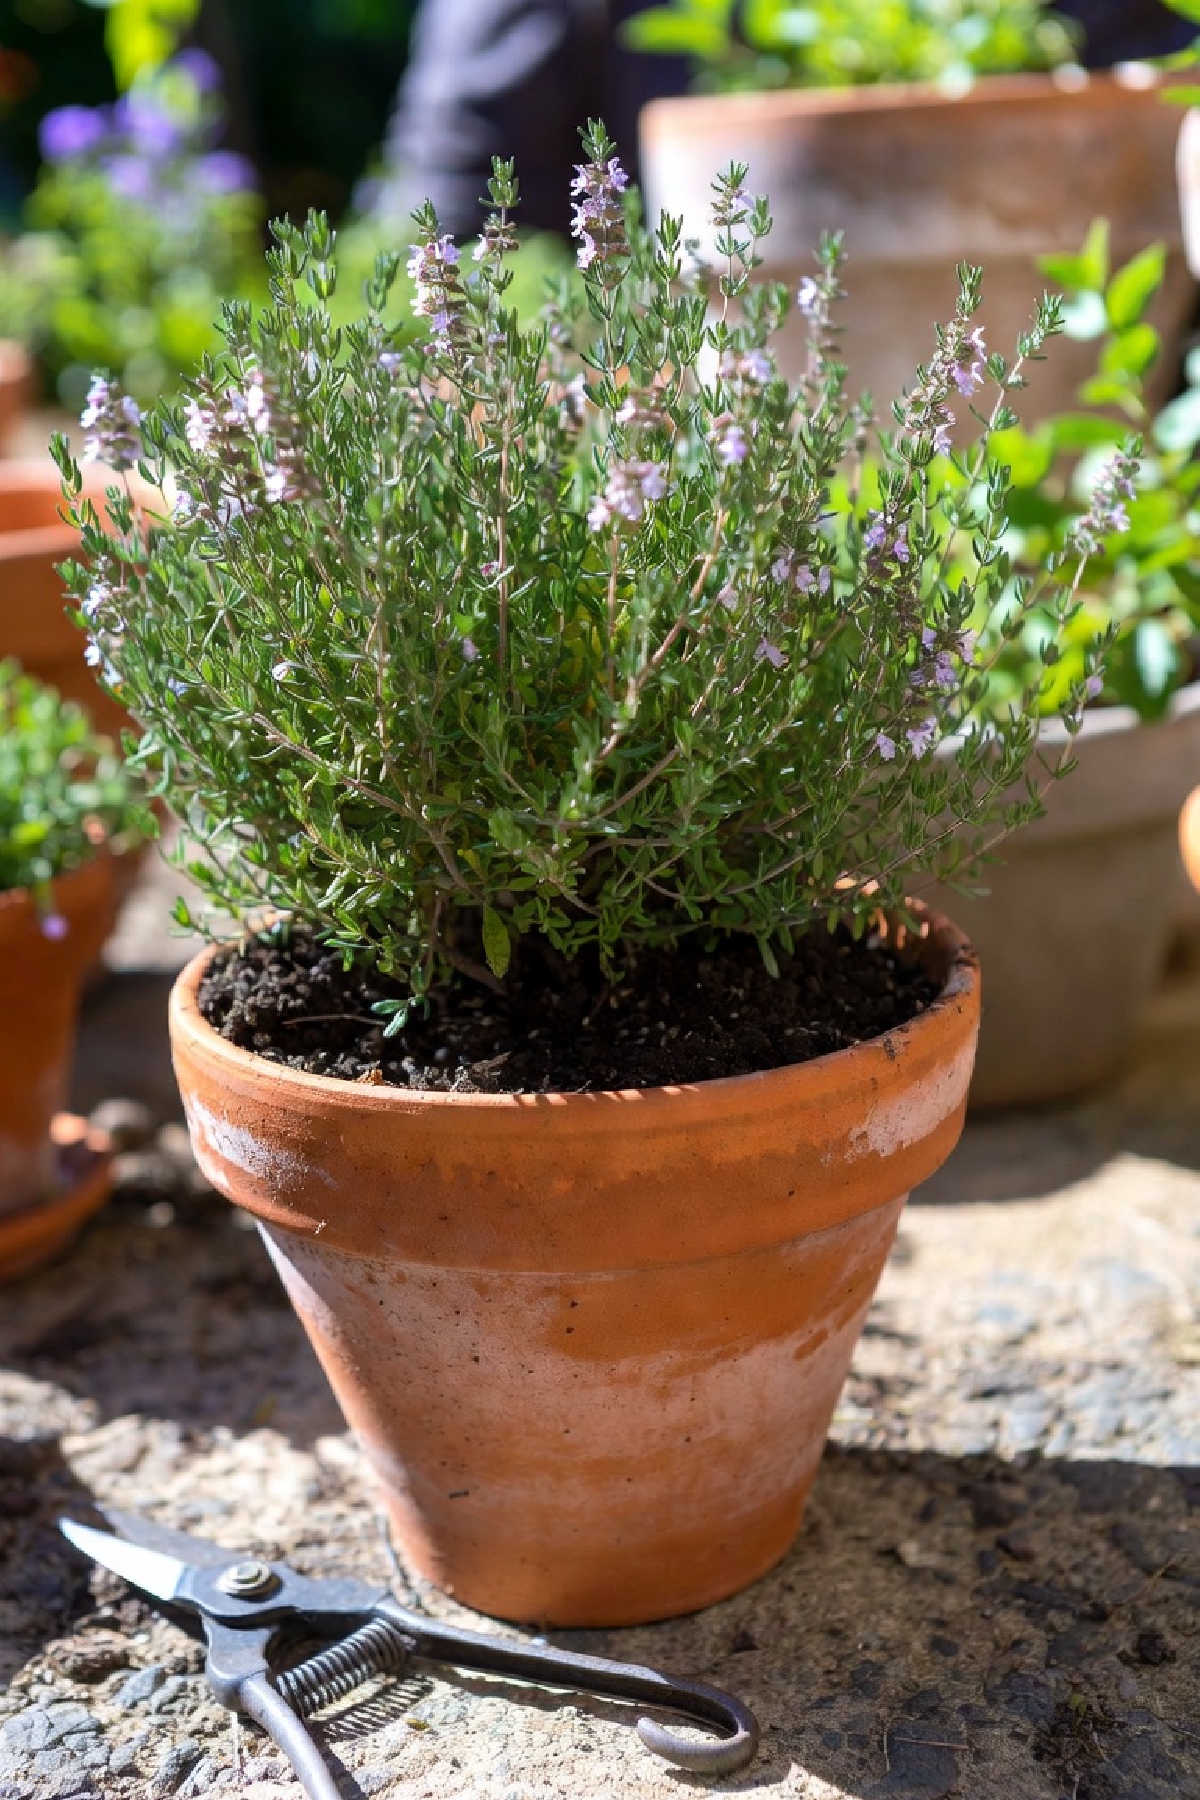
It's easy to forget to prune thyme or just not bother as it's not a big plant. But don't forget. Thyme does need pruning from its second year onwards.
Once the danger of frost is past prune thyme as follows:
- Cut right back very woody stems with no new growth on them.
- Cut right back any very long thin, spindly, woody stems.
- Cut back non branching stems to just above the first pair of leaves.
- Trim new growth all over to the first pair of leaves.
Prune one third of the plant again - cutting to the first pair of leaves - after flowering if you haven't harvested the thyme for drying or preserving.
Pruning so heavily will seem rather drastic but it will stimulate much healthier, thicker growth rather than lots of weedy, twisted stems.
How To Harvest Thyme

From the second year after planting, you can happily harvest thyme as and when you need it. Remember to cut to just above the first pair of leaves on a stem to stimulate stronger rather than thin spindly growth.
If you're harvesting thyme for drying or preserving, you want to harvest when the thyme's flavour is at its strongest, which you will typically find is :
- At the beginning of summer
- Just before flowering
- In the morning.
Thyme Pests & Diseases

Thyme plants are typically pretty hardy and resilient and can actually handle as we've seen harsh treatment when you are pruning. When thyme does struggle wit pests and disease it is usually due to unnecessary feeding, over watering and poor pruning.
Common Pests
The pests you might see on unhealthy thyme plants are :
- Spider mites
- Aphids
- Thrips
- Whiteflies
Spider Mites
Tiny arachnids that thrive in dry conditions. They leave fine webbing and cause yellow stippling (dots) on the leaves.
Aphids
Small, pear-shaped insects that cluster on new growth to suck sap. They can cause leaves to curl and leave behind a sticky "honeydew."
Thrips
Slender insects that "rasp" the leaf surface, creating silvery streaks or small black spots of excrement.
Whiteflies
Tiny white moth-like insects that hide on the undersides of leaves. Like aphids, they suck sap and weaken the plant.
Common Diseases
Almost all the diseases thyme suffers from are down to over watering. If you've got a very wet spring or summer it may actually be worth bringing thyme plant indoors. Four diseases to watch out for in wet conditions are :
- Root Rot (Phytophthora)
- Botrytis (Gray Mold)
- Powdery Mildew
- Rust
Root Rot
The #1 killer of thyme. Caused by overwatering or poor drainage, it turns the roots mushy and the foliage yellow or brown.
Botrytis
A fungus that appears in humid, crowded conditions. It looks like a fuzzy gray growth on stems and leaves, eventually leading to decay.
Powdery Mildew
A white, flour-like dusting on the leaves. It rarely kills the plant but stunts growth and ruins the harvest.
Rust
Appears as small, reddish-orange pustules on the undersides of leaves. It's a fungal issue often caused by poor air circulation.
Buying Thyme Seeds & Plants
If you want to buy thyme seeds and plants to get a beautiful range of thyme flavours for the kitchen look out for these varieties.
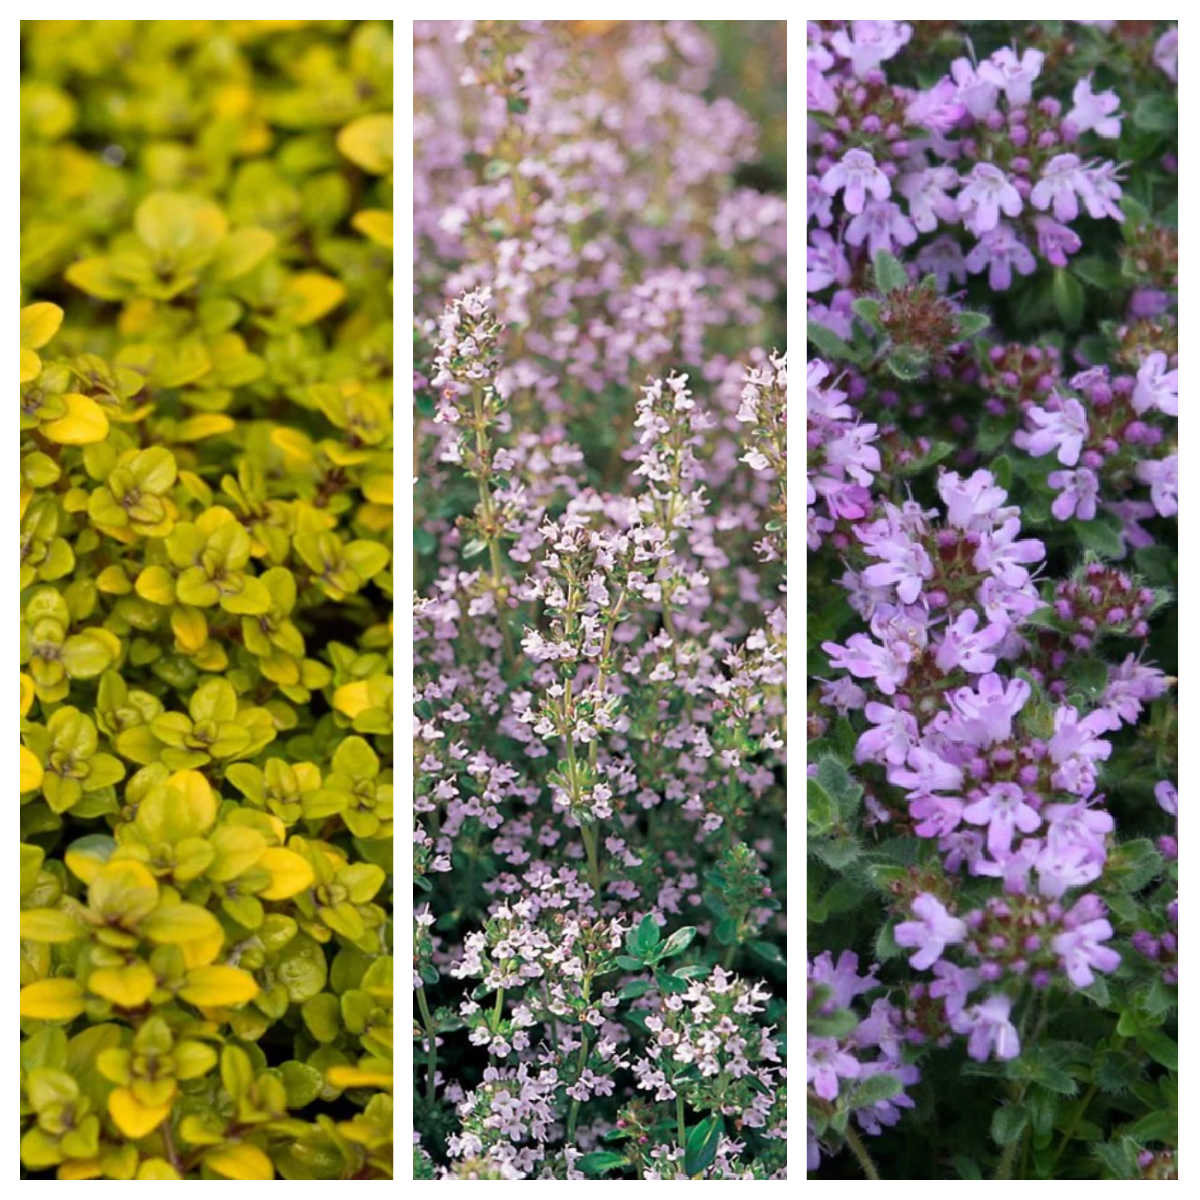
- Common thyme : thymus vulgaris - pretty pink flowers.
- Archers gold thyme : thymus pulegioides - lilac flowers, lovely lemon scent and flavour.
- Wooly or wild thyme : thymus polytrichus - pink, purple & white flowers - very attractive to bees. Bright slightly floral flavour.
- Lemon thyme : thymus citriodorus - lovely powerful lemon fragrance, yellow edged leaves.
- Jekka thyme : thymus jekka - great clean, classic thyme taste, pink & white flowers.
- Snowdrift thyme : thymus serpyllum - very pretty white flowers. Delicate, slightly sweet, sometimes faintly citrusy or honeyed flavour.
Health Benefits Of Thyme
Once your thyme plants are thriving you can use your fresh herbs in all sorts of natural remedies as thyme as both a natural antibiotic and antihistamine.
Thyme can be used to ease everything from minor tummy bugs to mouth infections but really comes into its own in soothing sore throat tea.
I do hope you have success growing thyme from either cuttings or seeds and that your plants whether inside or outdoors really thrive so you can enjoy fresh herbs all year round.
For more simple tips do check out my other herb growing posts and follow my gardening board on Pinterest.
Original image source : rawpixel.com
Willow Catkin Plant Lifecycle Activity

Simple Self Care Routine


Many of us these days are in serious need of a new self care routine. We feel overwhelmed with so many things we need to do and deep worries about finance, health, family and home.
But many of the self-care checklists or the ideas for self-care days we see are false friends. They don't nurture those gaping gaps in our lives or give us the self-care essentials we need in our everyday lifestyle to be able to care for ourselves and those we love.
So I have for you here an incredibly simple but powerful daily self-care routine based on 7 essential self-care habits that help us thrive physically and mentally even when life is tough.
Self Care Essentials
Daylight Dosing

Many of us are chronically short on one simple thing with huge impact on our :
- Happiness
- Energy
- Sleep (& baby sleep)
- Digestion
- Resistance to illness
- Vulnerability to auto immune disease
- And more!!
That simple thing most of us are missing is daylight. It doesn't just top us up with immune boosting vitamin D but actually triggers AND balances :
- Mood boosting serotonin
- Steady cortisol levels
- Digestive enzymes
- T-cell regulation
- Gut microbioeme
- Skin microbioeme (it controls dandruff!)
- And even baby calming hormones.
Real daylight on our eyes first thing in the morning also controls our body clock and the release of the melatonin we need in the evening to sleep well.
So self-care starts with getting enough daylight every single day.
Get More Daylight
Aim for an hour of daylight minimum and ideally at least two everyday. And when you're feeling stretched thin use all the little opportunities you can to slow down outdoors :
- Eat breakfast on your doorstep
- Stroll in the park
- And stop at a bench to read a novel
- Or catch up with a friend
- Eat lunch alfresco
- Nap in the garden
- Hang out on the porch to watch the world go by ...
Avoid Sugar

It is so easy to indulge ourselves with something sweet when feeling low but it is absolutely not self-care. Sugar is perhaps the single biggest trigger - matched only by iron deficiency - for :
- Energy crashes
- Mood swings
- Brain fog
- Headaches
And sugar is tied to more than 30 chronic conditions including IBS, Acne, UTI, candida, PCOS and more!
So for real self-care strip sugar from your diet and replace it with good quality fat and protein.
Walk The Mile

Serotonin - the happy hormone which oozes calm and stability - is a self-care essential but many of us go short. This is partly because of daylight deficiency but also because we're buzzing around full of the stress hormone cortisol which actually suppresses serotonin.
Caffeine and sugar spike cortisol but so does intensive exercise. Serotonin thrives in calm, steady movement and especially loves walking.
So make walking a mile - two if you can - a non-negotiable part of your self care routine and get the serotonin flowing.
Let Go Of A Little

Many of us are drowning in stress inducing clutter and have become border line hoarders. We get locked in anxiety at the thought of decluttering anything "in case we need it".
To break the cycle make the Just 10 Things declutter method part of your self-care routine. You take just 5 minutes daily to declutter 10 items. Every day you let go of a little you ease that paralysing anxiety and in a year you can clear out over 3,000 things!
Swallow A Frog

We all procrastinate and put off stuff we don't want to face up to, hoping if we hide it away at the back of our brain it will disappear. But it doesn't, it festers and makes our anxiety far far worse.
We're often told to swallow the frog to get it out of the way but it is much easier to get into the daily self-care habit of swallowing the tadpole and facing up to one tiny job we don't want to do before it has a chance to grow.
So every day tackle one tiny thing you have been hiding from and avoiding.
Connect For Real

It is the irony of the age that we have so many ways to communicate but so often feel horribly lonely. Most of our actual face-to-face or voice-to-voice communication happens at work or at school and that means it is not really ours, it belongs to someone else.
So we need to make deliberate intentional time every day for face-to-face, voice-to-voice, skin-to-skin communication that belongs to us :
- Real phone calls
- Sit down family meals
- Talking to people at the store
- Coffee with friends
- A quick drink with neighbours
- Snuggling up to watch TV
- Doing chores together etc etc ..
It won't be stress free, there will be fights but they will be real fights, our fights not artificial arguments driven and exploited by an algorithm!
Lay One Small Brick

It is very easy these days to feel alienated by an overriding sense we are stuck in second gear on a road to nowhere with no chance to build anything for ourselves. But even when we are horribly low we can.
We need first to identify what we personally actually want to build. Our goals could be :
- Meeting a partner
- Starting a family
- Building a saving fund
- Learning a life skill
- Developing a side hustle
- Creating art
- Growing your own food
- Finding a home
- Kicking off a start-up ...
Once we know what we are building we just need to make sure we lay at least one small brick in its foundations every single day. Laying that brick might be nothing more than 5 minutes scribbling some notes, drawing a diagram, sending an e-mail or making a call.
But sticking to that daily habit we will little by little build something and it will be our thing of which we can be proud.
OK, so now we've deep dived into the 7 key self-care habits we need to follow in our daily routine, let's bring them together in a simple self-care checklist.
Self Care Checklist

The hidden power of this self-care checklist, is that it doesn't involve carving out time for yet more things on our to-do list. We simply weave these essentials into everyday life :
- Get at least 1-2 hours daylight.
- Avoid added sugar.
- Walk a mile.
- Declutter just 10 things.
- Do one tiny job you're avoiding.
- Connect for real with real people.
- Little by little build something of which you can be proud.
I do hope this simple routine helps you build these self-care essentials into your everyday life even when it is hectic, stressed and downright hard. They truly are powerful habits for boosting resilience and bringing long term joy.
But if you are really struggling to manage your load right now do read the extra care check below ...
Extra Care Check

Low mood, poor energy, extreme fatigue, anger, anxiety and an overwhelming sense of being overloaded can all be big flashing signs of deficiency in these 4 key nutrients :
If you are struggling and haven't had these nutritional deficiencies checked in a blood test recently it really is worth seeing a doctor or pharmacist to get them done. Tackling any deficiencies is an essential foundation for your self care going forward.
For more simple advice do check out my other healthy living posts and follow me on Pinterest.
Natural Air Fresheners
Natural air fresheners can neutralise the real causes of bad smells in our home rather than simply smother them with dodgy fake fragrances.
And many of these natural odour eaters are already sitting in our cupboards ready to tackle the nasty stinks from pets and sneakers to toilets and towels that are making our homes pong!
So in this guide I'll take you through :
- Best natural air fresheners
- Which smells each tackle
- And how to use them to get your home smelling great fast.
But first a quick word about what's wrong with store bought air fresheners...
What's Wrong With Air Fresheners?
Air fresheners can give off VOCs tied to asthma and other health risks including hormone disruption. Yikes!!
With many of us experiencing weird allergies, autoimmune and hormonal issues it seems risky to pump chemicals into our homes that might contribute to our problems.
That doesn't mean natural odour eaters are risk free. But we do know what they are and often with air fresheners we don't. Big brand labels talk about "our eliminator" or "scent technology" which may include 50 different chemicals!
So natural air fresheners can help us reduce the risk of exposing our families to unknown ingredients AND save us money on stuff we don't need!!
Table of Contents
Baking Soda (Bicarb Of Soda)

Best For: vomit, urine, sneakers, carpets but great all rounder
Why It Works: turns stinky acids in vomit, urine & sweat into odourless water & salt and traps smelly gases in air.
How To Use: sprinkle on source of stink for 30 mins then vacuum up. Reapply if necessary. Leave overnight for very bad smells. Remove vomit and soak up dampness of vomit or sick with kitchen roll or rag before sprinkling baking soda.
Coffee Grounds

Best For: fridge, trash cans, fish, paint, musty mildew
Why It Works: rich in nitrogen and natural oils that absorb and neutralise odorous gases while leaving a mild roasted scent.
How To Use: place dried used grounds in a shallow bowl or open jar near the smell. Replace every few days. For bins or compost pails, sprinkle a small handful directly inside.
Corn Starch (Cornflour)

Best For: sneakers, laundry, towels, dish towels, washcloths
Why It Works: absorbs moisture and bacteria-laden sweat that cause sour, musty smells in fabrics and footwear.
How To Use: dust inside shoes or sprinkle on damp-smelling fabrics before washing. Leave overnight, then shake or wash out.
Hydrogen Peroxide

Best For: vomit, dog urine, cat urine, toilets, washing machine
Why It Works: oxidises organic matter and breaks down bacteria that create ammonia and sulphur smells.
How To Use: dilute 1 part peroxide to 2 parts water, spray on affected area, leave for 10–15 minutes, then rinse or wipe. Always test colourfastness first.
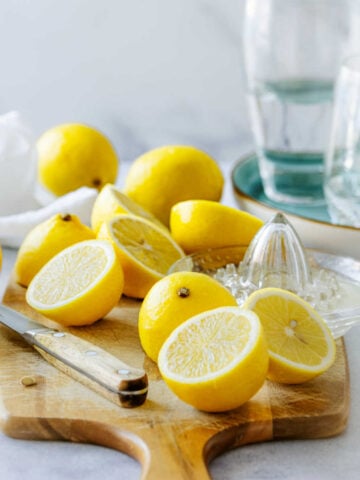
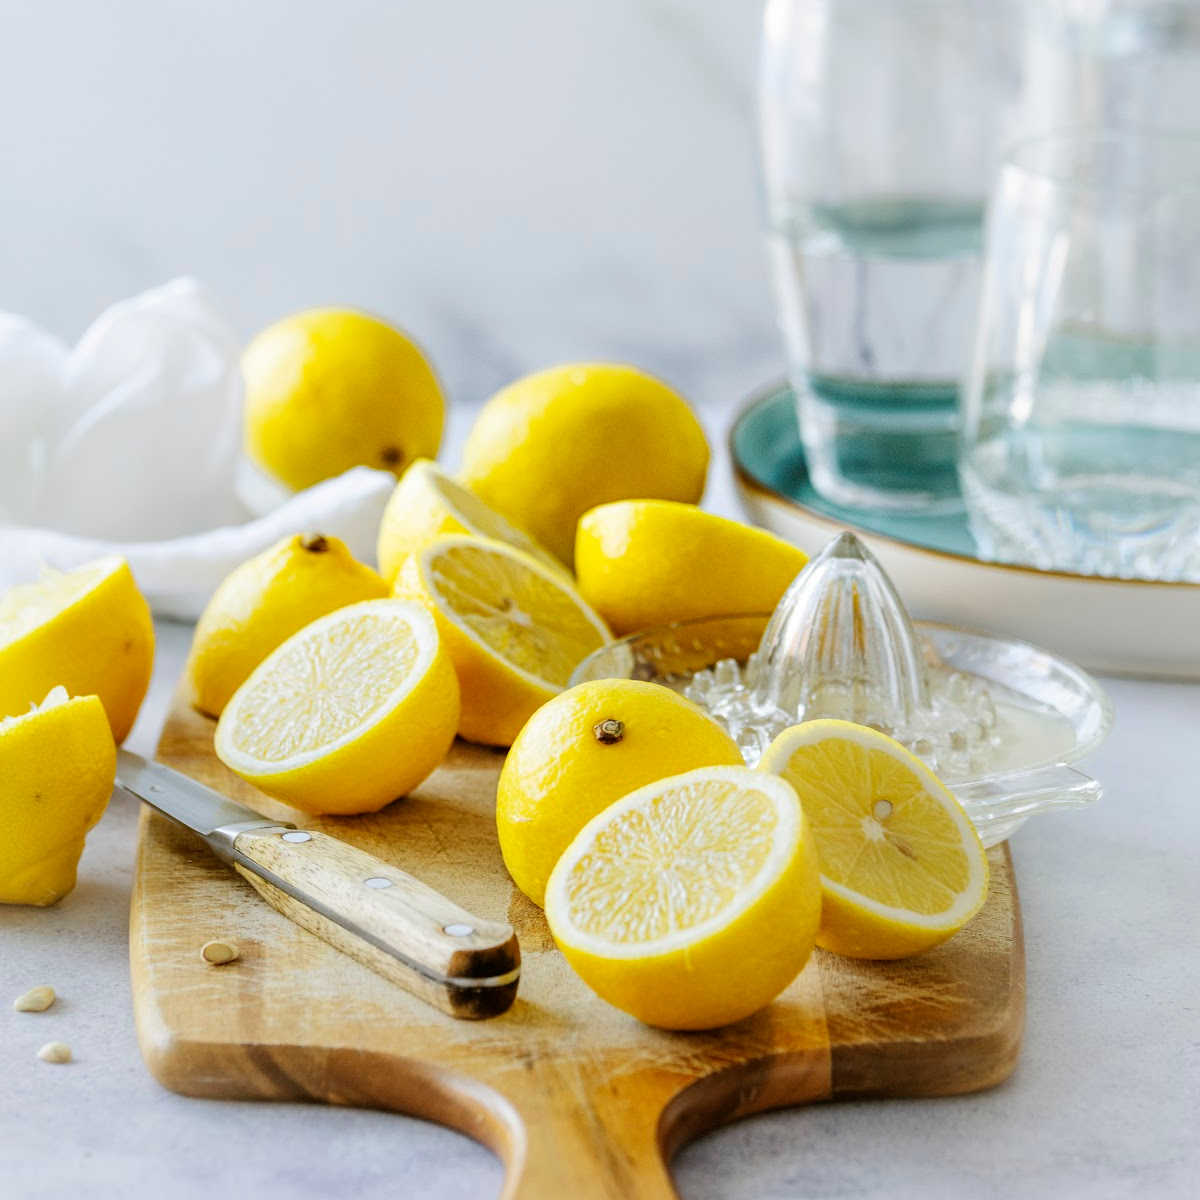
Lemons

Best For: microwave, oven, fish, paint, musty mildew
Why It Works: citric acid cuts through grease and neutralises volatile organic compounds while releasing fresh, antimicrobial lemon oil vapours.
How To Use: microwave a bowl of sliced lemon in water for 2–3 minutes, then wipe. For ovens or musty surfaces, rub with cut lemon or clean using lemon juice diluted in warm water.
Rubbing Alcohol (Surgical Spirit)

Best For: toilets, washing machine, trash cans, paint
Why It Works: kills bacteria, evaporates fast and carries away odorous compounds. Its solvent action helps lift residue that traps smells.
How To Use: wipe down affected surfaces with a 50/50 mix of alcohol and water. Let air dry. For bins or toilet seats, apply neat and leave for a few minutes.
Salt

Best For: fridge, fish, musty mildew, laundry, vomit
Why It Works: draws out moisture and slows bacterial growth that produces odours. Especially effective in damp or protein-based smells.
How To Use: sprinkle coarse salt over spill areas or store a small open bowl in fridge or cupboards. Rinse fabric stains with salted water before washing.
Sodium Percarbonate

Best For: laundry, washing machine, dish towels, towels, toilets
Why It Works: releases oxygen when dissolved, oxidising organic residues and killing odour-causing microbes.
How To Use: add 1–2 tablespoons to wash cycle or dissolve in hot water to soak fabrics. For toilet cleaning, pour in and leave for 15–30 minutes before scrubbing.
Tea Bags

Best For: sneakers, fridge, trash cans, microwave
Why It Works: tannins absorb moisture and neutralise smells, while tea’s mild antioxidants discourage bacterial growth.
How To Use: dry used tea bags thoroughly and place a few in shoes, bins or the fridge. Replace weekly.
Vinegar

Best For: dog urine, cat urine, laundry, washing machine, toilets, ovens, burnt food
Why It Works: acetic acid neutralises alkaline odours like ammonia and dissolves greasy or soapy residues that trap smells. The vapour also cuts through burnt or smoky residues.
How To Use: mix equal parts vinegar and water in a spray bottle, apply to source, leave 10 mins then rinse. For laundry, add a cup to rinse cycle.
Boiling Vinegar Steam (for burnt food or oven): heat a bowl of vinegar and water mix until just below boiling — allow steam to loosen odours and residues. Always keep the door open or well-ventilated to avoid irritation. Never leave boiling vinegar unattended.
Very Hot Water

Best For: microwave, oven, vomit, urine, musty mildew
Why It Works: heat loosens and evaporates volatile odour compounds, kills bacteria and opens porous surfaces for deeper cleaning.
How To Use: rinse or steam-clean surfaces with near-boiling water, taking care with materials that can warp. For microwaves, heat a bowl of water until steamy, then wipe clean.
Extra Odour Eaters
Activated Charcoal
Best For: compost pails, fridge, trash cans, paint, burnt food
Why It Works: ultra-porous carbon traps volatile compounds and sulphur gases responsible for strong odours.
How To Use: place charcoal granules or pouches in compost lids, fridge shelves, or near fresh paint. Refresh monthly by leaving in sunlight for a few hours.
Bay Leaves
Best For: trash cans, musty mildew, laundry cupboards, fridge
Why It Works: aromatic oils in bay inhibit mould and neutralise musty air with a fresh, spicy scent.
How To Use: place a few dried leaves in bins, cupboards, or drawers. Replace every few weeks when scent fades.
Cinnamon
Best For: oven, microwave, trash cans, musty mildew
Why It Works: its aromatic compounds suppress bacterial growth and overpower unpleasant odours with warm spice.
How To Use: simmer cinnamon sticks in water for 10 minutes to scent air, or add a pinch of ground cinnamon to a warm cleaning solution for bins or microwaves.
Clove Oil
Best For: musty mildew, toilets, compost pails, washing machine
Why It Works: clove’s eugenol oil kills mould spores and bacteria while masking musty air with a warm, spicy scent.
How To Use: mix a few drops with water or vinegar in a spray bottle, shake, and mist over tiles, bins or washing machine seals. Wipe off after 30 minutes.
And there you go 15 natural non-toxic air fresheners that you can use quickly and easily to tackle bad smells and get your home smelling great.
For more natural housework tips do check out my other non-toxic cleaning posts and follow my Non Toxic Cleaning board on Pinterest.
Edible Simmer Pots


Simple simmer pots are a lovely way to make our homes smell good naturally without dodgy synthetic fragrances.
Seasonal spices simmering on the stove top on cold days smell good enough to eat but usually they're NOT edible which is horribly sad!!
So I have here the very best edible simmer pots that taste as good as they smell. They are all deliciously fragrant recipes you can slot in meal plans, pop on as a cosy evening treat or whip up to make your home smell great fast.
And all these edible simmer pots are tried-and-tested recipes you can make easily from what you've got in your cupboards. Take your pick from :
- Mulled Drinks & Punch
- Hot Chocolates With A Twist
- Flavoured Lattes
- Fragrant Soups
- Aromatic Teas
- Spicy Stove Top Fruit
With ideas for everything from mulled wine and pumpkin spice latte to ginger bread hot chocolate, roast chestnut soup and brandy cherries ... enjoy!!
Table of Contents
Mulled Drinks & Punch

Mulled drinks and punch are a lovely way to fragrance your home with a combination of citrus or fall fruit PLUS seasonal spices including ginger, cinnamon, star anise, cloves etc.
Simply simmer gently for 20 minutes or so then strain out spices and fruit and pop back on a low stove to keep warm for your party or a hygge evening in.
Viennese Christmas Punch

This hot Christmas punch recipe is for real traditional Viennese Christmas market punch and is a perfect way to get your home smelling great in advance of parties throughout the holiday season from Halloween on.
Simmer Time : steep for 10 minutes, simmer for 5 to 10.
Ingredients : black tea, orange juice, sugar, rum, cointreau, cinnamon sticks, cloves, star anise.
Hot Mulled Winter Punch

This hot mulled winter punch is somewhere between a classic punch and traditional mulled wine. It is red wine rather than tea based but given the extra punch kick with Grand Marnier or Cointreau.
Simmer Time : simmer gently 15-20 minutes before removing zest & spices. Keep warm on gentle heat.
Ingredients : red wine e.g. claret, orange & lemon zest, demerara sugar, cinnamon stick, fresh ginger, cloves, Grand Marnier / Cointreau or similar.
Mulled Wine

This mulled wine has the extra fragrant twist of apple cider - NOT apple cider vinegar - PLUS too often forgotten cardamom which has a lovely sweet-but-spicy aroma for fall and winter.
Simmer Time : gently for 30 minutes.
Ingredients : fruity red wine e.g. Merlot, apple cider, orange zest, orange slices, honey, cloves, cardamom, cinnamon sticks, star anise, brandy.
If you do love cardamom check out this delicious apple cardamom cake recipe for some fragrant fall baking.
Mulled Cider

This simple mulled apple cider is the perfect simmer pot on a crisp autumn day after a long hike or some apple picking and would be a great addition to a grown up Halloween party.
Simmer Time : 30 minutes+
Ingredients : apple cider, cinnamon sticks, cloves, star anise, orange peel.

This alternative mulled cider recipe is very similar but has the added fragrance of lemon and ginger plus - if you like - a splash of brandy!
Mulled Apple Juice

Simple mulled apple juice is a delicious alternative to mulled cider for kids and again perfect after autumn outdoor adventures or for a Halloween party ...
Simmer Time : simmer quickly until warm but not for kids too hot
Ingredients : apple juice, orange, cloves, cardamom, cinnamon sticks, nutmeg, honey.

This mulled apple juice is very similar but gives you a longer simmer time ...
Simmer Time : 30 minutes+
Ingredients : apple juice, orange zest, cinnamon stick, nutmeg
Both the mulled apple juice recipes would be delicious with one of these super easy homemade apple cakes.
Spiced Cranberry Juice

As we hit holiday season you can get your home guest ready fast with a quick speed clean and a simmer pot of mulled cranberry juice ...
Simmer Time : 5 minutes
Ingredients : pure cranberry juice, lemon & orange slices, brown sugar, cinnamon sticks, raw ginger, cloves, star anise.

This similar very simple mulled cranberry recipe can be made with cranberry cocktail juice and gets an extra zing from some rum or gin.
Simmer Time : 5 minutes+
Ingredients : cranberry cocktail juice, orange juice, cinnamon stick, cloves, ginger, honey, rum or gin.

This spiced cranberry infusion is a bit different but will still make your home smell great. The recipe basically creates a spiced cranberry syrup you can add chilled to cocktails.
Simmer Time : 45 minutes
Ingredients : cranberry juice, fresh ginger, cinnamon sticks, nutmeg.
Spiced Pear Cider & Juice

Spiced pear juice is a great alternative to mulled apple juice in autumn but also works wonderfully at Christmas ...
Simmer Time : 10 minutes + 10 minute steep.
Ingredients : pear juice, clementines, lemon juice, cloves, cardamom, fresh ginger.
If you like the idea of Christmas pear flavours check out this pear & ginger trifle in my Christmas Dessert Guide.

For an alcoholic kick to your pear juice try this mulled pear & ginger recipe from Jamie Oliver ...
Simmer Time : simmer until sugar dissolved
Ingredients : apple juice, ripe pears, fresh ginger, cinnamon sticks, cardamom pods, light brown sugar, lime juice, Bacardi Oro or other rum.
Mulled Orange Juice

Oranges are of course another top Christmas fragrance and this super simple mulled orange juice is perfect for children.
Simmer Time : 10 minutes or so
Ingredients : orange juice, cinnamon stick, cloves.

This spiced orange juice with chai tea is almost an alcohol free alternative to Austrian orange punch ...
Simmer Time : 20 minutes
Ingredients : orange juice, chai tea, chai spice mix, sliced orange
Both drinks would make a lovely fragrant accompaniment to an evening making your own pretty dried orange Christmas decorations for rustic Christmas decor.
Hot Chocolates With A Twist

Classic hot chocolate made with real chocolate - not just cocoa powder - can make your whole home smell amazing fast and you can easily make it even more amazing with a few fragrant seasonal twists including gingerbread, peppermint, orange and cinnamon.
Classic Hot Chocolate

This classic is a classic hot chocolate recipe if you haven't got one ...
Simmer Time : 10 minutes
Ingredients : milk, sugar, cocoa powder, dark chocolate, vanilla extract, whipping cream, powdered sugar
This recipe is obviously full of sugar but you can make stunning hot chocolate with barely a teaspoon of sugar by pouring heated milk over smashed up 70-85% dark chocolate and topping with whipped cream.
Gingerbread Hot Chocolate

I adore baking gingerbreads at Christmas and this gingerbread hot chocolate is the perfect partner for snaffling them down on a cosy December afternoon ...
Simmer Time : 12 minutes
Ingredients : milk, cocoa powder, brown sugar, fresh ginger, allspice, cloves, cinnamon sticks, thick cream, powdered/icing sugar.
Peppermint Hot Chocolate

Peppermint is another Christmas fragrance that gets us in a wonderfully nostalgic mood and this peppermint hot chocolate is perfect for fragrancing your home before snuggling down to watch a Christmas movie ...
Simmer Time : 8 minutes
Ingredients : milk, dark chocolate, cocoa powder, brown sugar, cornstarch, vanilla extract, peppermint extract, whipping cream, peppermint candies.
The hot chocolate would be scrumptious with this easy white chocolate candy cane bark or candy cane Christmas fudge.
Hot Orange Chocolate

Orange chocolate is another beloved Christmas tradition in my family that can easily be extended to super smelling hot orange chocolate ...
Simmer Time : 10 minutes
Ingredients : milk, dark chocolate, cocoa powder, orange juice, orange peel, sugar, vanilla extract.
Cinnamon Hot Chocolate

If you want to get your home smelling sweet for holiday season breakfasts make this cinnamon hot chocolate to go with straight from the oven - but made ahead - Scandinavian style Christmas breakfast buns ...
Simmer Time : 5-10 minutes
Ingredients : milk, cocoa powder, cinnamon, sugar, vanilla extract.
Flavoured Lattes

Coffee shops lure us in every autumn with the scent of sweet-smelling lattes in every more glorious flavours but we can make our own homes equally fragrant for a fraction of the price with these easy stove top recipes.
Pumpkin Spice Latte

If you come all over pumpkin spiced latte every October you must master this recipe. It needs pumpkin puree which you can buy but it is incredibly easy to make your own to freeze in ready to use ice-cube sized blocks ...
Simmer Time : 5 minutes
Ingredients : coffee/espresso, milk, pumpkin puree, cinnamon, ginger, cloves, sugar or maple syrup, whipped cream.
Peppermint Mocha Latte

This peppermint mocha latte is - like the peppermint hot chocolate - perfect for Christmas afternoons watching movies or playing games as you much homemade fudge or candies ...
Simmer Time : 5 minutes
Ingredients : espresso, milk, granulated sugar, mint leaves or extract, chocolate syrup.
For quickness you can use bought chocolate syrup but this freezable homemade chocolate syrup is deliciously simple to make.
Hazelnut Latte

This recipe for hazelnut latte is incredibly easy made with bought syrup but for even more fall fragrance you can roast hazelnuts to make your own simple hazelnut syrup ..
Simmer Time : 5 minutes
Ingredients : espresso, milk, hazelnut syrup.
Orange Cardamom Latte

This sweet and spicy orange cardamom latte recipe can be made in a flash but for even more flavour and simmer pot fragrance you could infuse the milk with cardamom pods - rather than powder - and orange zest ...
Simmer Time : 5 minutes
Ingredients : espresso, milk, cardamom powder, orange zest, maple syrup.
Chestnut Praline Latte

Copycat chestnut praline latte can be made super quickly with chestnut syrup but for even more fragrance you can roast chestnuts to make your own chestnut syrup which will keep sealed in the fridge for 2 weeks ...
Simmer Time : 20 minutes
Ingredients : espresso, milk, chestnuts, pecans, dark brown sugar, cane sugar, vanilla extract, whipping cream
Vanilla Latte

This vanilla latte is perfect when you are short on time and the cupboards are a bit bare but you still want a delicious drink that will make your home smell great ...
Simmer Time : 5 minutes
Ingredients : espresso, milk, granulated sugar, vanilla extract.
Spiced Apple Cider Latte

If you want full on fall fragrance in your morning coffee, this spiced apple cider latte is the one for you!!
Simmer Time : 5 minutes
Ingredients : espresso, milk, apple juice, honey, pumpkin spice (cinnamon, ginger, allspice, cloves), nutmeg, star anise, whipped cream.
Chai Latte

A simple chai latte is a lovely calming way to scent your kitchen without quite such a cortisol kick of caffeine as the espresso recipes ...
Simmer Time : 15 mins
Ingredients : black tea, milk, cinnamon sticks, black peppercorns, cloves, cardamom pods, star anise, fresh ginger, maple syrup.
Fragrant Soups

Fabulously fragranced fall and winter soups make fantastic edible simmer pots. They will keep your home smelling good for hours and deliver deliciously stomach warming meals into the bargain - what's not to like?
Classic Pumpkin Soup

Pumpkin soup is a wonderful edible simmer pot as soon as pumpkins appear at the market in September and nights start drawing in. This classic pumpkin soup recipe couldn't be easier.
Simmer Time : 10 minutes
Ingredients : pumpkin, onion, garlic, vegetable/chicken broth, cream.
Spicy Pumpkin Soup

For a spicier scent try this roasted pumpkin soup which is richly fragranced with fall spices and apple cider vinegar ...
Simmer Time : 20 minutes + 1 hour roasting pumpkin
Ingredients : pumpkin, onion, garlic, ginger, cumin, coriander, turmeric, cardamom, coconut or other milk, vegetable broth, apple cider vinegar.
Roast Chestnut Soup

If you love chestnut lattes and the fragrance of chestnuts you have to try these French style chestnut soups.
This first recipe uses pre-roasted and peeled chestnuts that are quicker and easier to cook with ...
Simmer Time : 20 minutes
Ingredients : cooked & peeled chestnuts, shallot, carrot, celery, garlic, thyme, bay leaf, vegetable broth, heavy cream, nutmeg.

This second chestnut soup made with skillet roasted and peeled chestnuts is a bit more effort but the chestnuts roasting in a stove top skillet will smell unbelievably good ...
Simmer Time : 20 minutes
Ingredients : chestnuts, mushrooms, garlic, onion, vegetable stock, bay leaves, thyme.
Ginger & Carrot Soup

The lovely fall fragrances of ginger and cinnamon work wonderfully in this simple carrot soup ...
Simmer Time : 30 minutes
Ingredients : carrots, onion, garlic, fresh ginger, cinnamon powder, vegetable broth, bay leaf.
Caraway Seed Soup

The sweet-spicy aroma of caraway in this traditional Czech potato soup is a lovely traditional alternative to classic cinnamon and ginger ...
Simmer Time : 20 minutes
Ingredients : potatoes, onions, caraway seeds, flour, egg, vegetable broth / stock, parsley greens.
Apple & Cheddar Soup

If you adore cheese as much as I do try scenting your kitchen with this apple & cheddar soup on the stove top. It smells and tastes scrumptious ...
Simmer Time :
Ingredients : apples, apple cider, cheddar, cream, sweet potato, onion, garlic, flour, chicken stock, thyme, bay leaves, brandy, bacon (optional).
Rosemary White Bean Soup

For a fresh take on fall fragrances copy the Italians and scent your kitchen with a classic rosemary & white bean soup given an extra tahini twist ...
Simmer Time : 20 minutes
Ingredients : white beans, rosemary, thyme, lemon, parsley, onion, garlic, celery, carrots, vegetable broth, tahini.
Rosemary Squash Soup

Rosemary combined with sage also makes a great fragrant addition to this butternut squash soup ...
Simmer Time : 35 minutes
Ingredients : butternut squash, rosemary, sage, ginger, onion, garlic, vegetable broth, parsley, pumpkin seeds
Spicy Stove Top Fruit
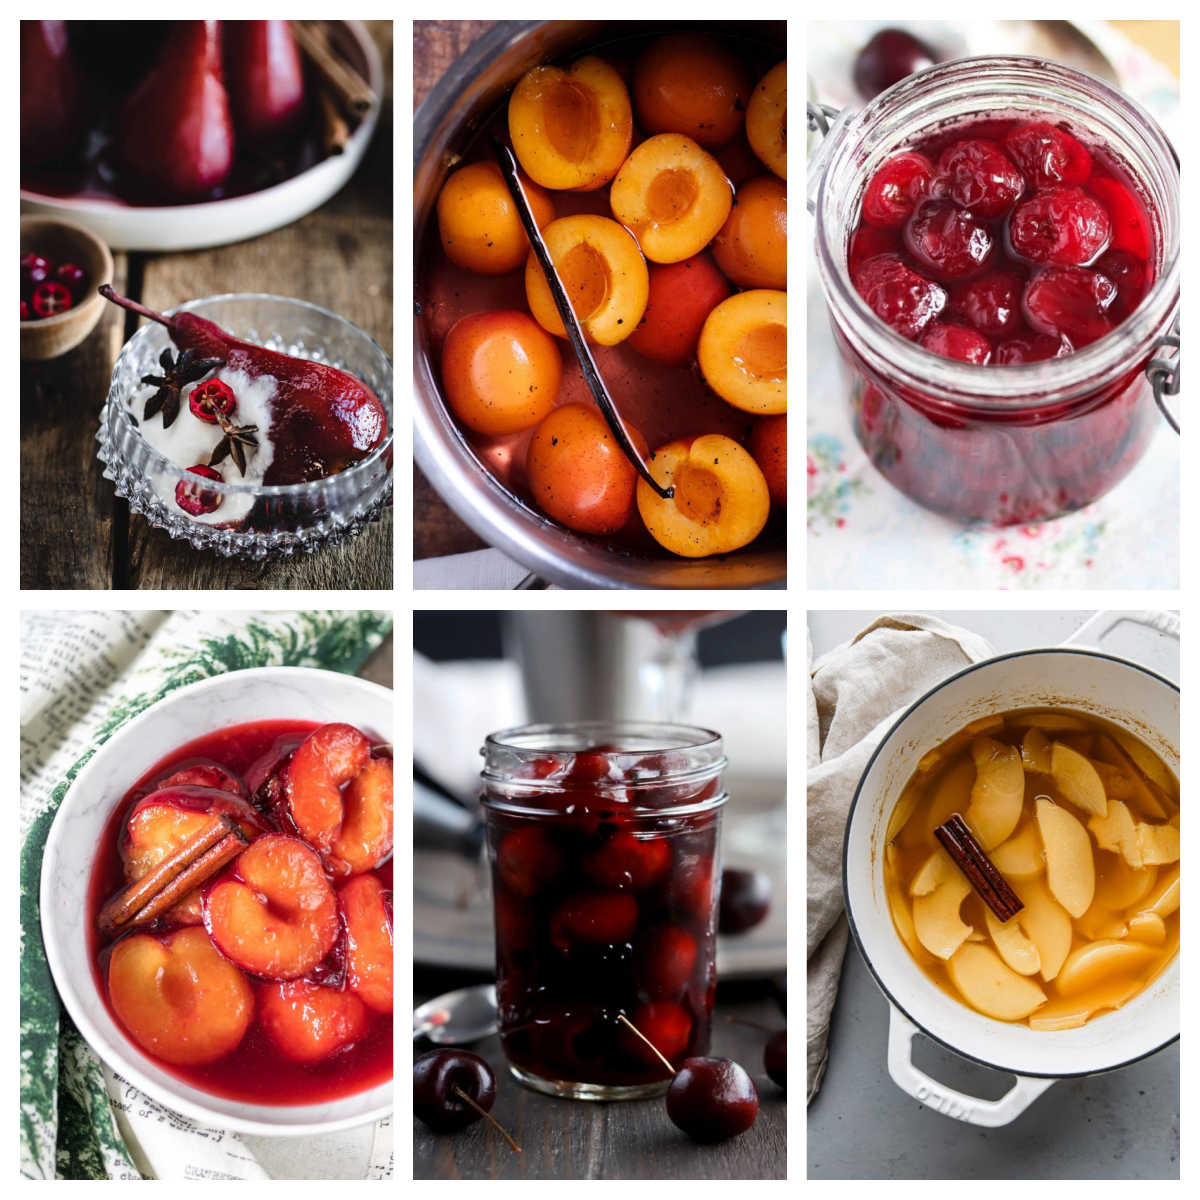
Seasonal fruit poached, stewed or caramelised on the stove top with spices, and perhaps red wine or brandy, taste delicious and smell divine.
Red Wine Poached Pears

These red wine-poached pears are elegant enough for a dinner party dessert but are so simple you can get on with a pre-guest speed clean whilst they simmer away scenting your kitchen ...
Simmer Time : 1 hour
Ingredients : pears, Pinot Noir, star anise, cinnamon stick, cloves, granulated sugar, yoghurt, cranberries.
Honey Spiced Quince

Quinces are one of those forgotten fruit you need to discover if you haven't and this fragrant poached quince recipe brings out their flavour and aroma perfectly ...
Simmer Time : 25 minutes
Ingredients : quinces, fresh ginger, cinnamon stick, lemon peel, cloves, vanilla extract, honey, granulated sugar.
Honey Spiced Figs

These honey spiced figs will naturally fragrance your home with an amazing deeply sweet aroma ...
Simmer Time : 30 minutes.
Ingredients : figs, white wine, honey, cardamom pods, allspice berries, peppercorns, almonds, orange peel.
Figs In Port

Alternatively you can simmer beautifully caramelised figs in port for an even richer scent ...
Simmer Time : 10 mins
Ingredients : figs, sugar, port, peppercorns.
Cherries Jubilee

All sorts of cuisines have Christmas stove top cherry recipes that smell as good as they taste. This classic cherries jubilee recipe couldn't be easier :
Simmer Time : 10 minutes
Ingredients : cherries, orange, unsalted butter, granulated sugar, salt, kirsch / brandy / bourbon, vanilla extract, vanilla ice cream.
Brandy Cherries

Homemade brandy cherries will fill your home with holiday season fragrances and are perfect for popping in Christmas party cocktails ...
Simmer Time : 10 minutes
Ingredients : cherries, brandy, rum, cinnamon, nutmeg, cherry juice, turbinado sugar.
Kirsch Cherries

This cherries in kirsch recipe which actually preserves the cherries so they will keep for up to 6 months would make a wonderful homemade Christmas preserve gift ...
Simmer Time : 20 minutes
Ingredients : cherries, Kirsch, star anise, cinnamon sticks, cloves, granulated sugar, lemon juice.
Cinnamon Stewed Plums

These cinnamon stewed plums are a super simple and speedy way to make an autumnal dessert and make your home smell lovely ...
Simmer Time : 8 minutes
Ingredients : plums, sugar, cinnamon stick, orange juice.
Rosé Poached Apricots
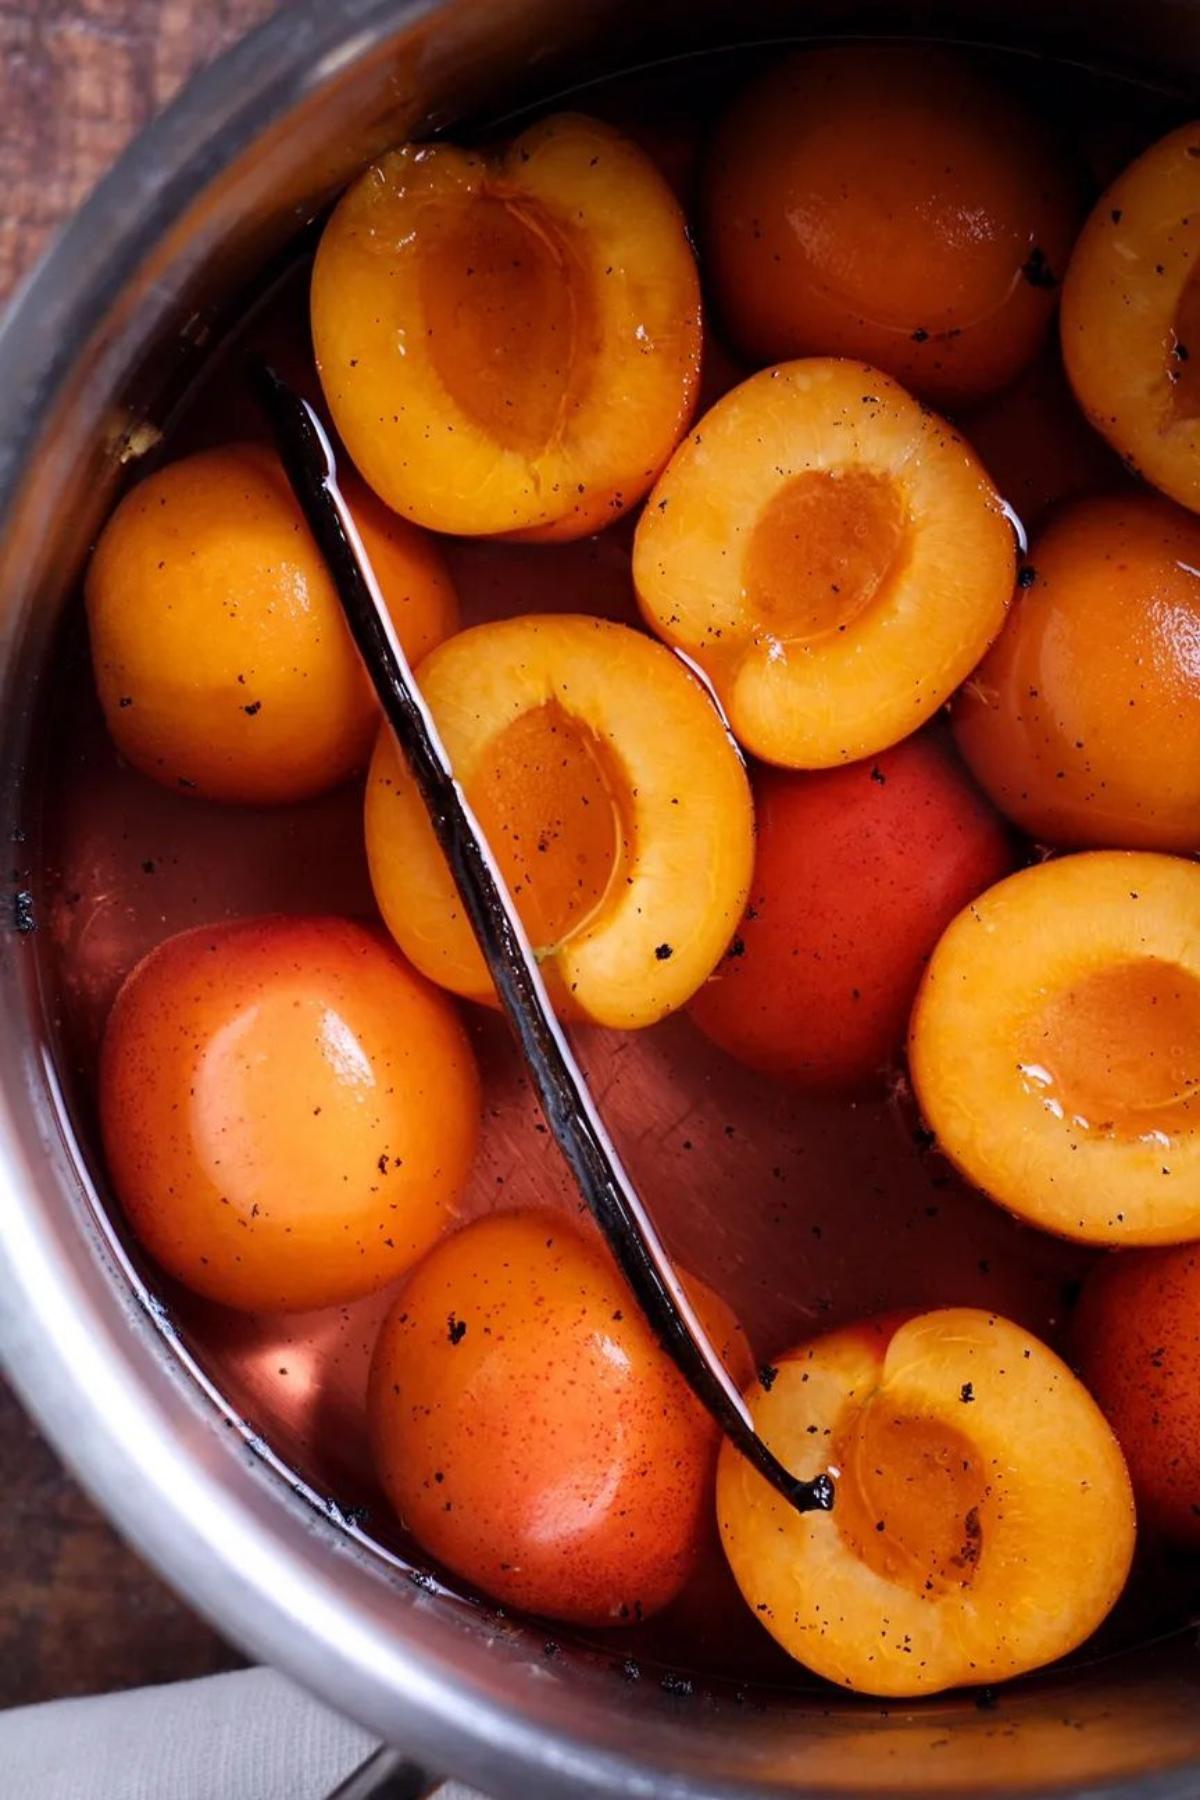
These rosé poached apricots are lovely delicate way to scent your home with simmering apricots and vanilla. Simple Christmas shortbread would be the perfect partner for the fruit ...
Simmer Time : 30 minutes
Ingredients : apricots, rosé wine, vanilla pod, sugar.
If you can't find good apricots, you could also use the recipe to make a peach dessert.
Aromatic Teas

Simple aromatic teas are a lovely way to calm your nerves and scent your home when the holiday season is getting hectic ...
Lemon & Ginger Tea

This lemon & ginger tea recipe could not be simpler and the lemon is actually a natural odour eater which neutralises stinks and pongs in the air whilst releasing fresh lemon vapours ...
Simmer Time : 10 minutes
Ingredients : lemon, fresh ginger, turmeric, honey.
Lemon & Thyme Tea

The simple thyme in this lemon & thyme tea is actually a natural antibiotic with all sorts of benefits for our health and it's natural fragrance can help lemon gently shift unpleasant smells that may be lingering ...
Simmer Time : 20 minutes
Ingredients : lemon, thyme, honey.
These simple lemon teas also work as very effective homemade cough and sore throat remedies.
Peppermint Tea Latte

A peppermint tea latte is a lovely, calming way to get into the holiday season spirit with all the fragrance of peppermint minus the caffeine kick of peppermint latte ...
Simmer Time : 3 minutes
Ingredients : milk, peppermint extract, maple syrup.
Rosemary Tea

The rosemary in this rosemary tea is another natural antibiotic and natural odour eater that can help see of musty smells whilst making your home smell deliciously seasonal ..
Simmer Time : 4 minutes
Ingredients : rosemary.
And there you go, over 40 deliciously fragrant edible simmer pots that taste as good as they smell. I hope they help you make your home smell amazing naturally this year.
- « Previous Page
- 1
- 2
- 3
- 4
- …
- 48
- Next Page »